
VMware monitoring with Zabbix, Python & vPoller
I’ve been a Zabbix user for quite some time already, but one thing that Zabbix lacked for a long time is the ability to monitor VMware vSphere environment.
For some time I’ve been looking for alternatives, but being a Zabbix user and supporter, I’ve decided that if we don’t have VMware monitoring in Zabbix yet, well… I could possibly add support for it!
So, I’ve decided that I would actually start a new project on my own.
However one thing that I didn’t know at the time I first started with my new project was that the Zabbix folks were already working on getting VMware vSphere monitoring in their next release. VMware vSphere support in Zabbix became available with the 2.2.0 release of Zabbix
Now, you might be thinking that all that work I’ve been doing was a waste of time for me, but I really don’t think so.
The project I’ve been working on eventually became something more. It was not just oriented towards Zabbix anymore. It became a general purpose VMware vSphere Poller allowing it to be integrated into systems which would require access to vSphere Objects, but do not have native support for it.
That project was named vPoller – VMware vSphere Distributed Pollers written in Python.
So, in this post we will see how to use vPoller and integrate it with
Zabbix in order to perform monitoring of your VMware vSphere
environment. vPoller has been released for some time already, but
until now I haven’t really found time to write about the Zabbix
integration with vPoller. So, in this post we are going to talk about
Zabbix and vPoller and how to use them together in order to monitor
VMware vSphere environment.
But, before we do that let’s first see why you would want to have vPoller instead of stock Zabbix vSphere support and what are the differences between both.
How stock Zabbix compares to Zabbix with vPoller
The table below tries to summarize the VMware vSphere features of stock Zabbix and Zabbix with vPoller:
| Feature | Zabbix with vPoller | Stock Zabbix |
|---|---|---|
| Discovery of vSphere objects | Yes | Yes |
| VMware support built in Zabbix | No | Yes |
| VMware Datacenter support | Yes | No |
| VMware Clusters support | Yes | Yes |
| VMware Hypervisors support | Yes | Yes |
| VMware Virtual Machine support | Yes | Yes |
| VMware Datastore support | Yes | Basic |
| Is easy to extend | Yes | No |
| Is scalable | Yes | Yes |
| VMware monitoring with older Zabbix releases | Yes | No |
Now let’s say a few words about the table info above. Zabbix VMware vSphere support is already part of latest Zabbix releases (2.2.0 and above), but in my opinion it still needs some work on it.
For example with stock Zabbix you get what get – all the VMware vSphere support is built-in directly into Zabbix. From one side that is okay, but from another it is not so good. One example is that you cannot simply get new VMware vSphere items easily in your Zabbix templates in order to get more data out of your vSphere environment. In that case you are left alone – you either wait for the next release of Zabbix which would give you that new feature/items or end up patching Zabbix yourself with these new features. Both of these scenarios might not be what you really want to do.
Another issue I’ve seen with stock Zabbix VMware vSphere support is that it doesn’t play well with recent vSphere releases, e.g. with the 5.5 releases. Most of the time I’m seeing Zabbix items being disabled due to timeouts, while there are no real timeouts. Lots of users have encountered this issue as well, so this probably means a bug somewhere in Zabbix, which would hopefully get fixed soon. You can check just a few of the many issues already reported regarding this issue here, here and here.
With Zabbix and vPoller integration what you get is this – extending the number of supported items is easy. You just need to specify the vSphere Object and it’s property name and you can start monitoring that item right away. It is that easy to add support for something that you don’t have yet!
vPoller uses the official Python vSphere bindings, developed and supported by VMware. That guarantees that vPoller will stay compatible with future VMware vSphere releases as well.
vPoller scales. vPoller uses ZeroMQ in order to
create a distributed system of vSphere workers responsible for polling
of vSphere object properties. This is similar to the Zabbix Proxies,
except that you can run any number of vPoller Workers on a single
machine.
If you want to read a bit more about vPoller you can do so
here, here, here and
here. You can also find more information about vPoller
at the Github repository of
vPoller.
You might still be asking yourself why would you want to try out Zabbix with vPoller integration? Here are few more reasons:
- Want to be able to add more items to Zabbix templates, but don’t want to wait for the next Zabbix release
- Want to monitor your VMware vSphere environment, but you are running an older Zabbix release and cannot afford to upgrade Zabbix yet
- Just want to try something else and different
Installation and configuration
Now, let’s start with the installation and configuration of Zabbix with vPoller integration.
I am assuming you already have Zabbix installed and configured
already. Next thing you need is to get vPoller installed and
configured. For installing and configuring vPoller, please refer to
the vPoller Github repo
documentation, which contains
all the details regarding installation and configuration.
When you are ready with the vPoller installation and configuration
make sure you have your vPoller Workers started and ready for
polling from your VMware vSphere hosts.
Once you have Zabbix and vPoller installed and configured it is time
for us to import the Zabbix vPoller Templates. In order to do that
grab the latest Zabbix vPoller Templates from the Github
repository
and import them into Zabbix.
Once you import the Zabbix vPoller Templates you should see eight
new templates in Zabbix. You can see the templates from the screenshot
below:

Now we need to add two scripts to the Zabbix externalscripts
directory. The scripts we need to put there are the vpoller-zabbix
and cvpoller-zabbix, which are simply wrapper scripts for use with
vPoller and Zabbix.
Grab the vpoller-zabbix and cvpoller-zabbix scripts from the links
below and place them in your Zabbix externalscripts directory:
Make sure these scripts are executable as well:
$ sudo chmod 0755 $externalscripts/vpoller-zabbix $externalscripts/cvpoller-zabbix
And that was all for the installation and configuration. In the next chapter of this post we will see how to add a VMware vCenter server and start monitoring it.
Monitoring with Zabbix and vPoller
Okay, time to start monitoring our VMware vSphere environment.
Let’s go ahead and add a VMware vCenter server, so we can start monitoring it.
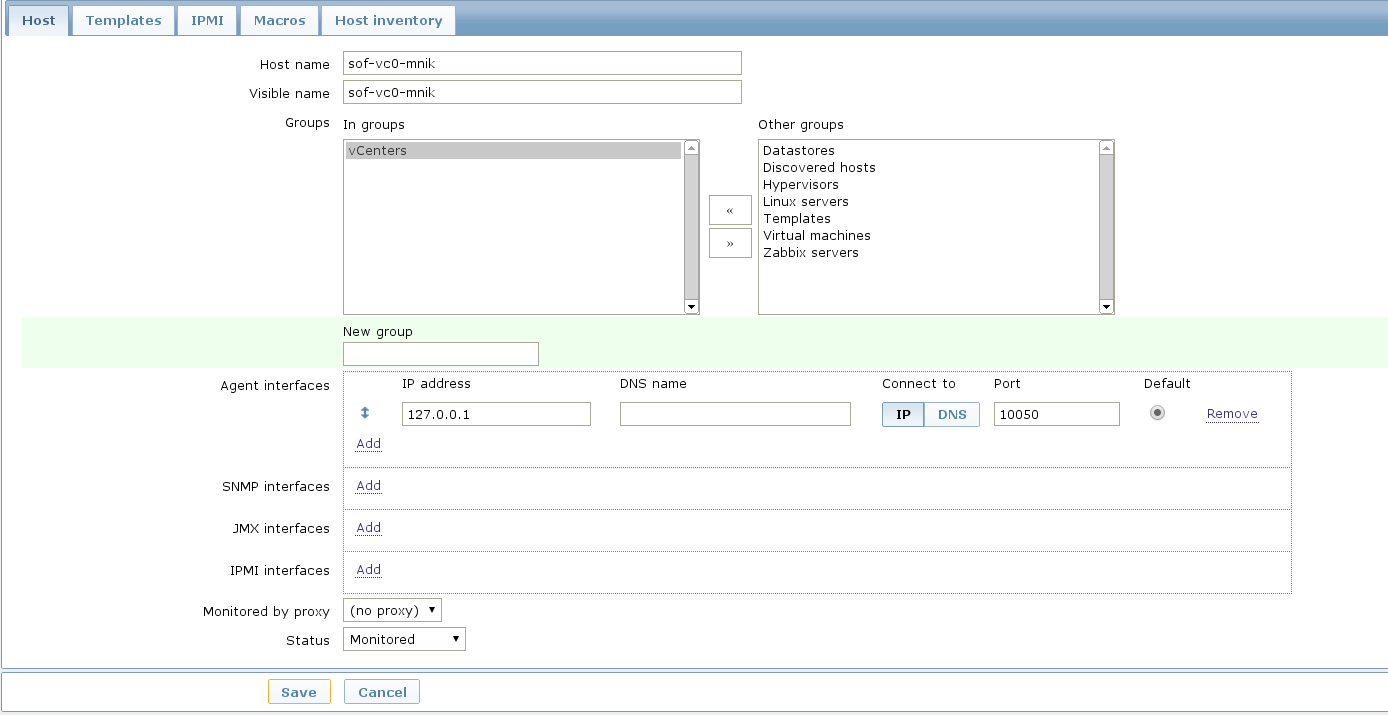
Login to your Zabbix frontend and navigate to Configuration ->
Hosts, then at the top-right click on the Create host button. Fill
in the hostname of the vCenter we are going to monitor and add it to a
group, e.g. vCenters in my case.
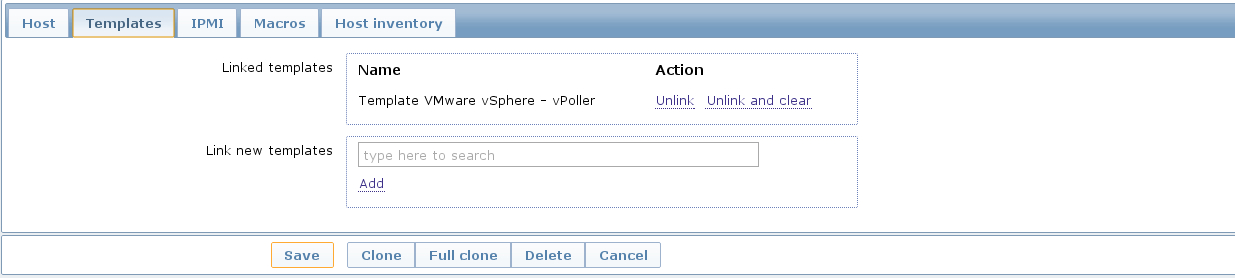
Next, click on the Templates tab and add the Template VMware
vSphere - vPoller template to your vCenter.
The last thing we need to do is add a macro for our vSphere
host. Navigate to the Macros tab and add the {$VSPHERE.HOST} macro
with value the hostname of the vSphere host.

Once done, click the Save button and you are ready.
Soon enough Zabbix will start sending requests to vPoller which
would be discovering and polling object properties from your VMware
vSphere environment. Using vPoller Zabbix will discover all your
hosts, virtual machines, datastores and start monitoring them.
Let’s see some example screenshots of Zabbix monitoring a VMware vSphere environment using vPoller.
Checking the latest data for our vCenter server:
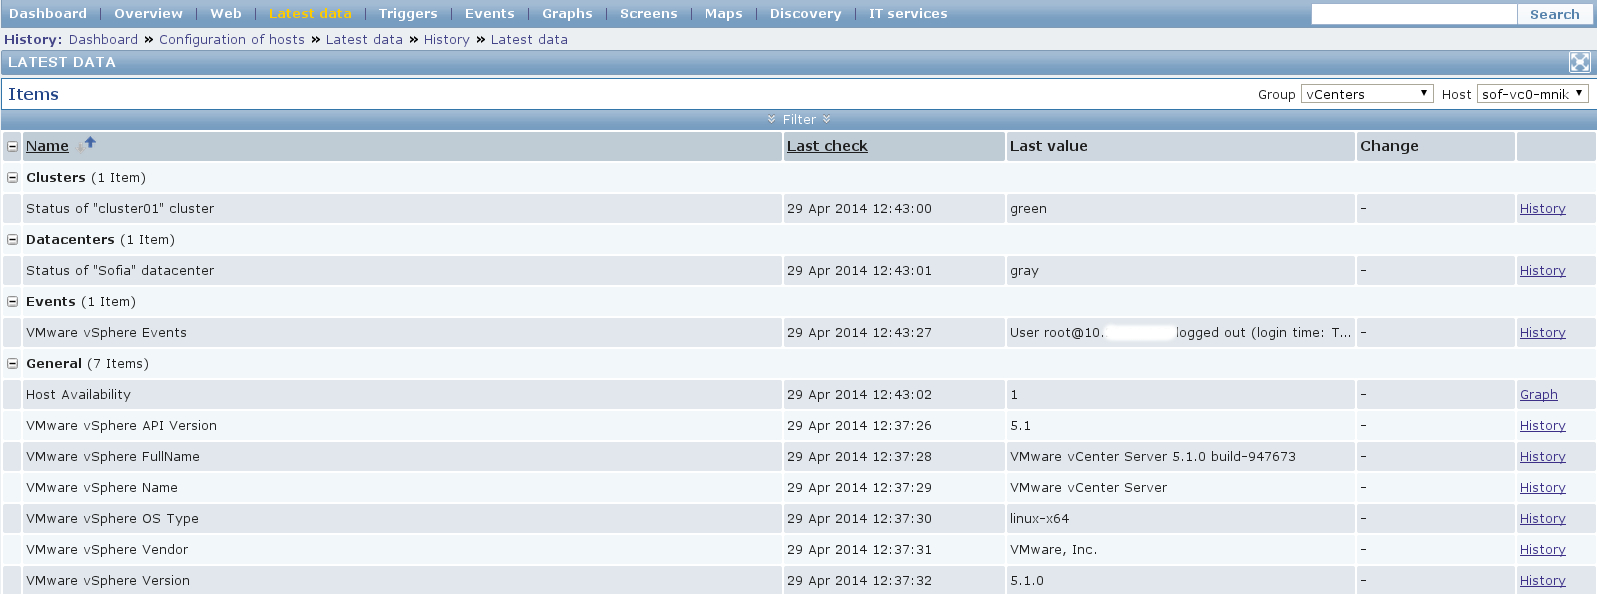
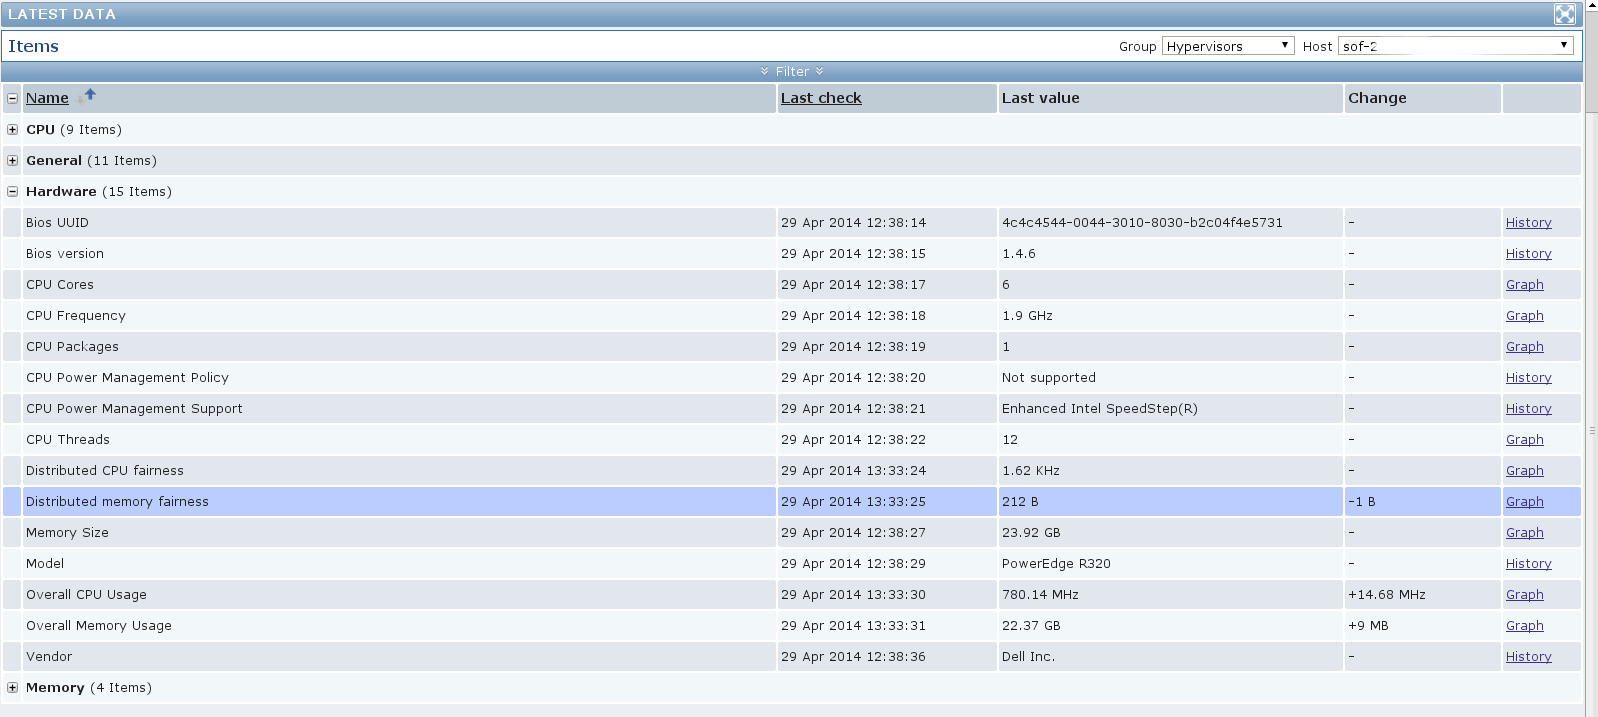
Let’s see the latest data for some of our ESXi hosts:
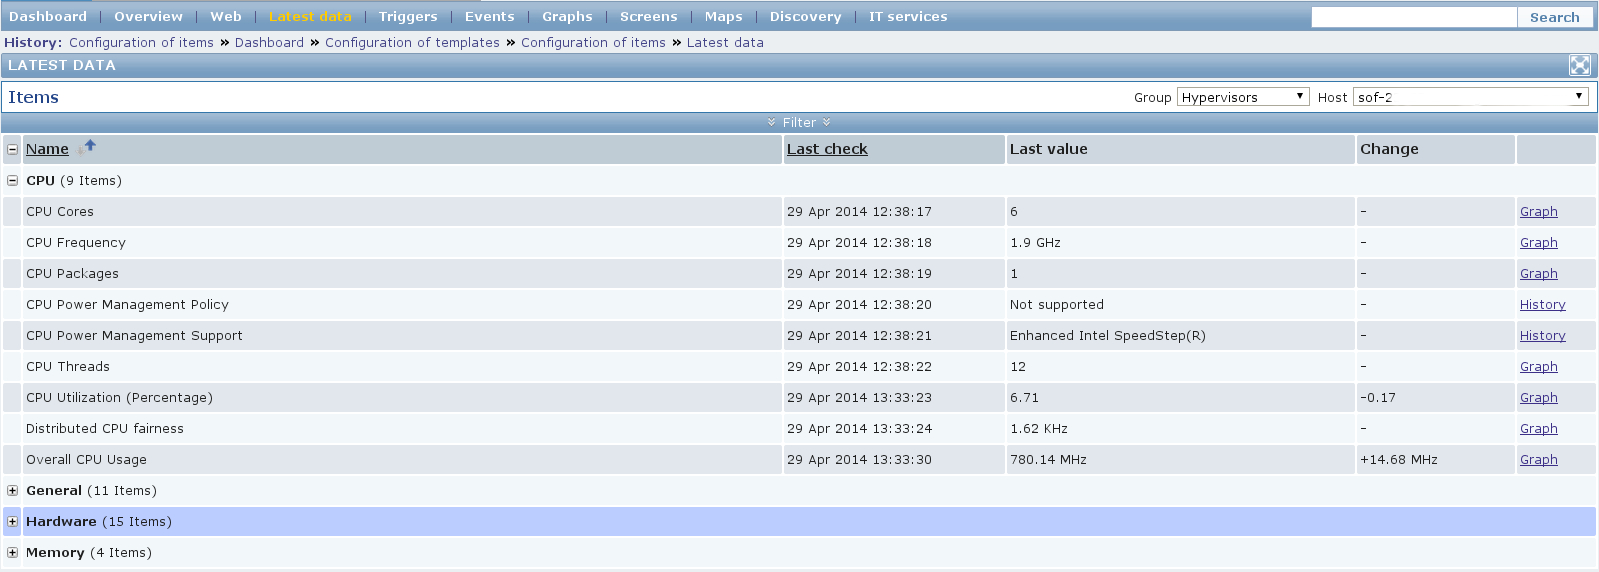
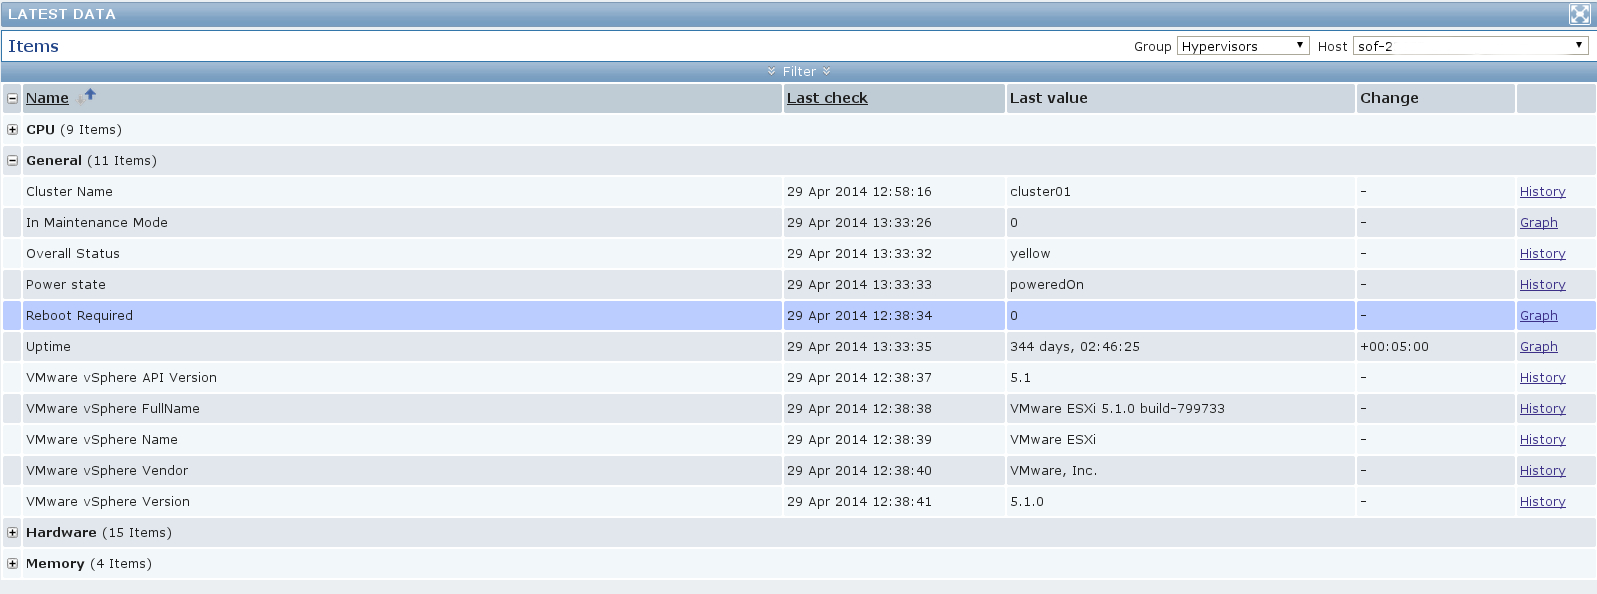
And here is the latest data for some of our Virtual Machines:
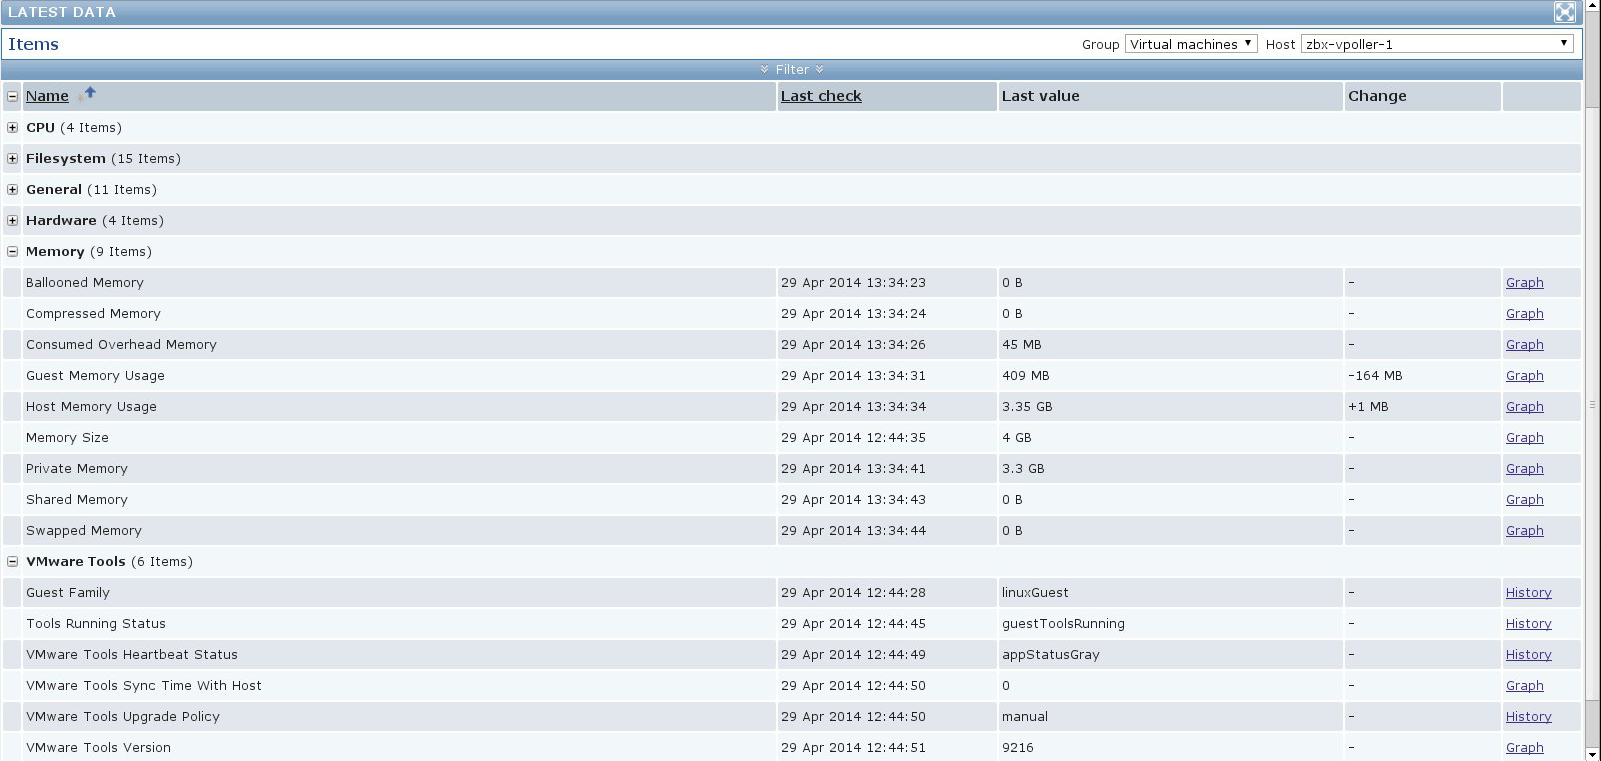
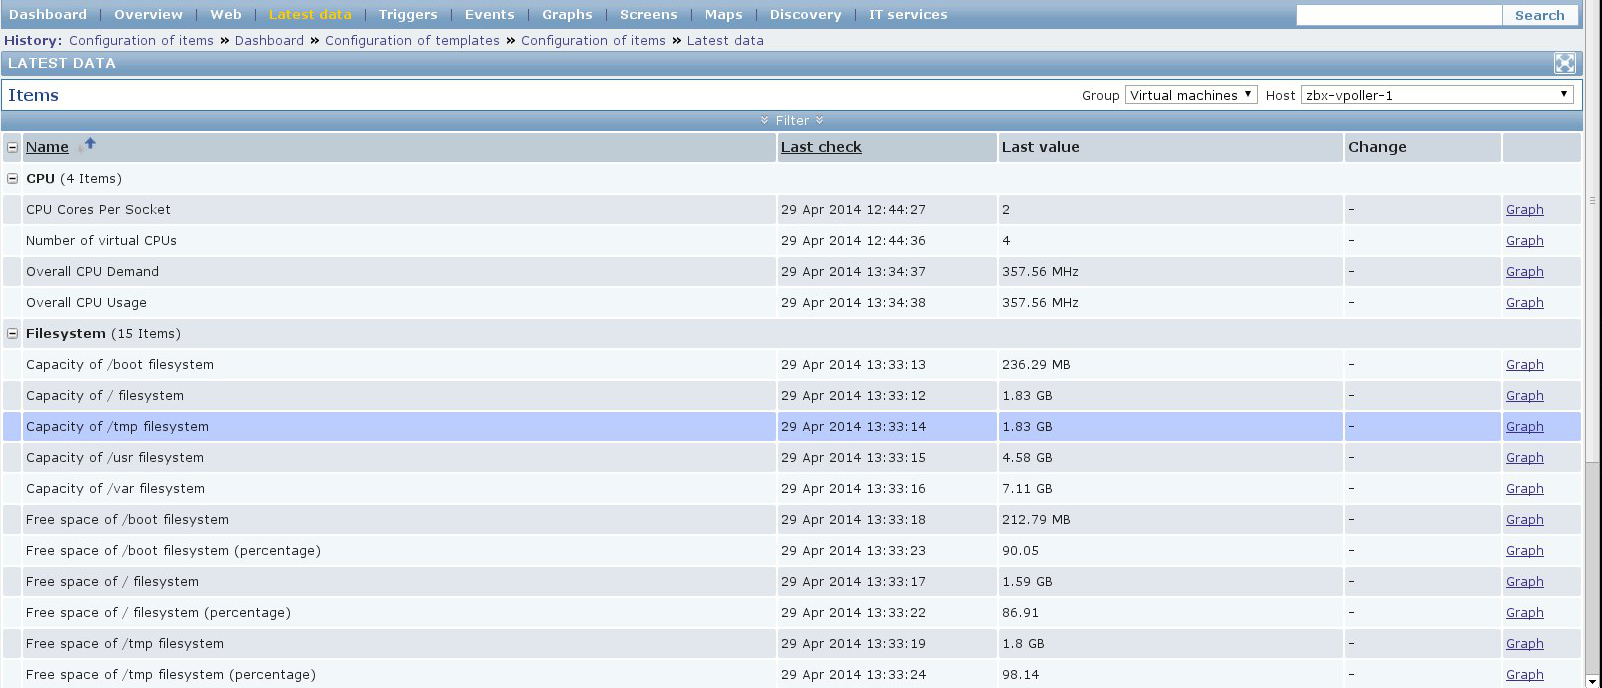
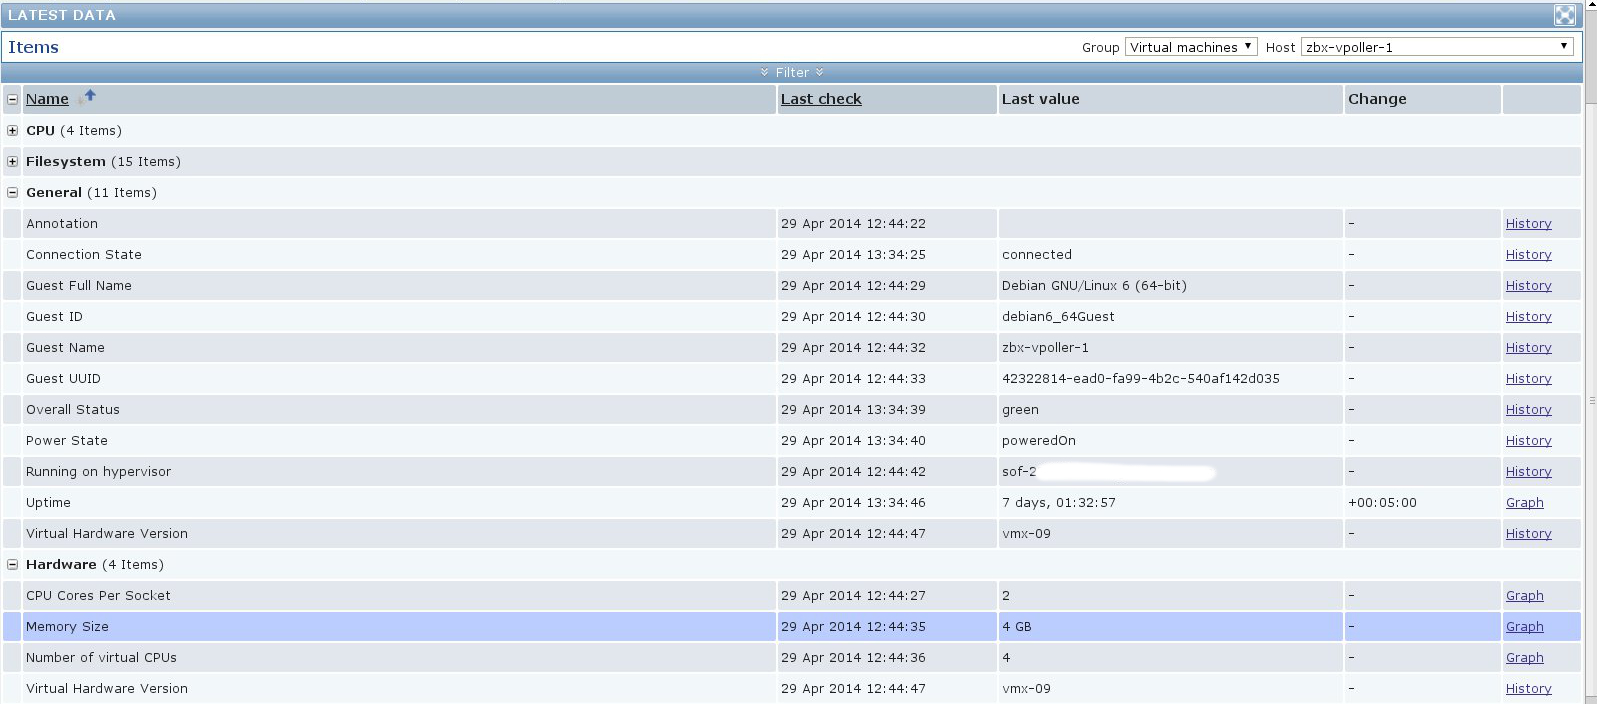

As you can see we can get quite a lot of information from our VMware vSphere environment by using Zabbix and vPoller.
If you have any questions or issues regarding vPoller, please submit an issue to the vPoller issue tracker at Github.