
Remote SDR setup with SDRplay & Raspberry Pi
One of the things I like doing in my spare time is messing around with Software-defined radio (SDR).
Few years ago I started out with a simple setup – got myself an RTL-SDR dongle, hooked it up to the computer and connected an antenna. My choice of operating system is GNU/Linux and (btw) I run Arch Linux as my daily driver. Next thing was to configure the RTL-SDR driver, install gqrx and start it up. Pure joy.
Ever since I’ve started with SDR I’ve been using it to listen to random ham operator conversations, track satellites, listen to distant short-wave stations, receive and decode radio faxes, listening to the International Space Station (ISS), etc.
It’s a fun thing to do with lots of possibilities! My wife thinks differently, though. She thinks that “I’m just playing with some toys”. And in a way she might be right, but it’s still a fun thing to mess with.
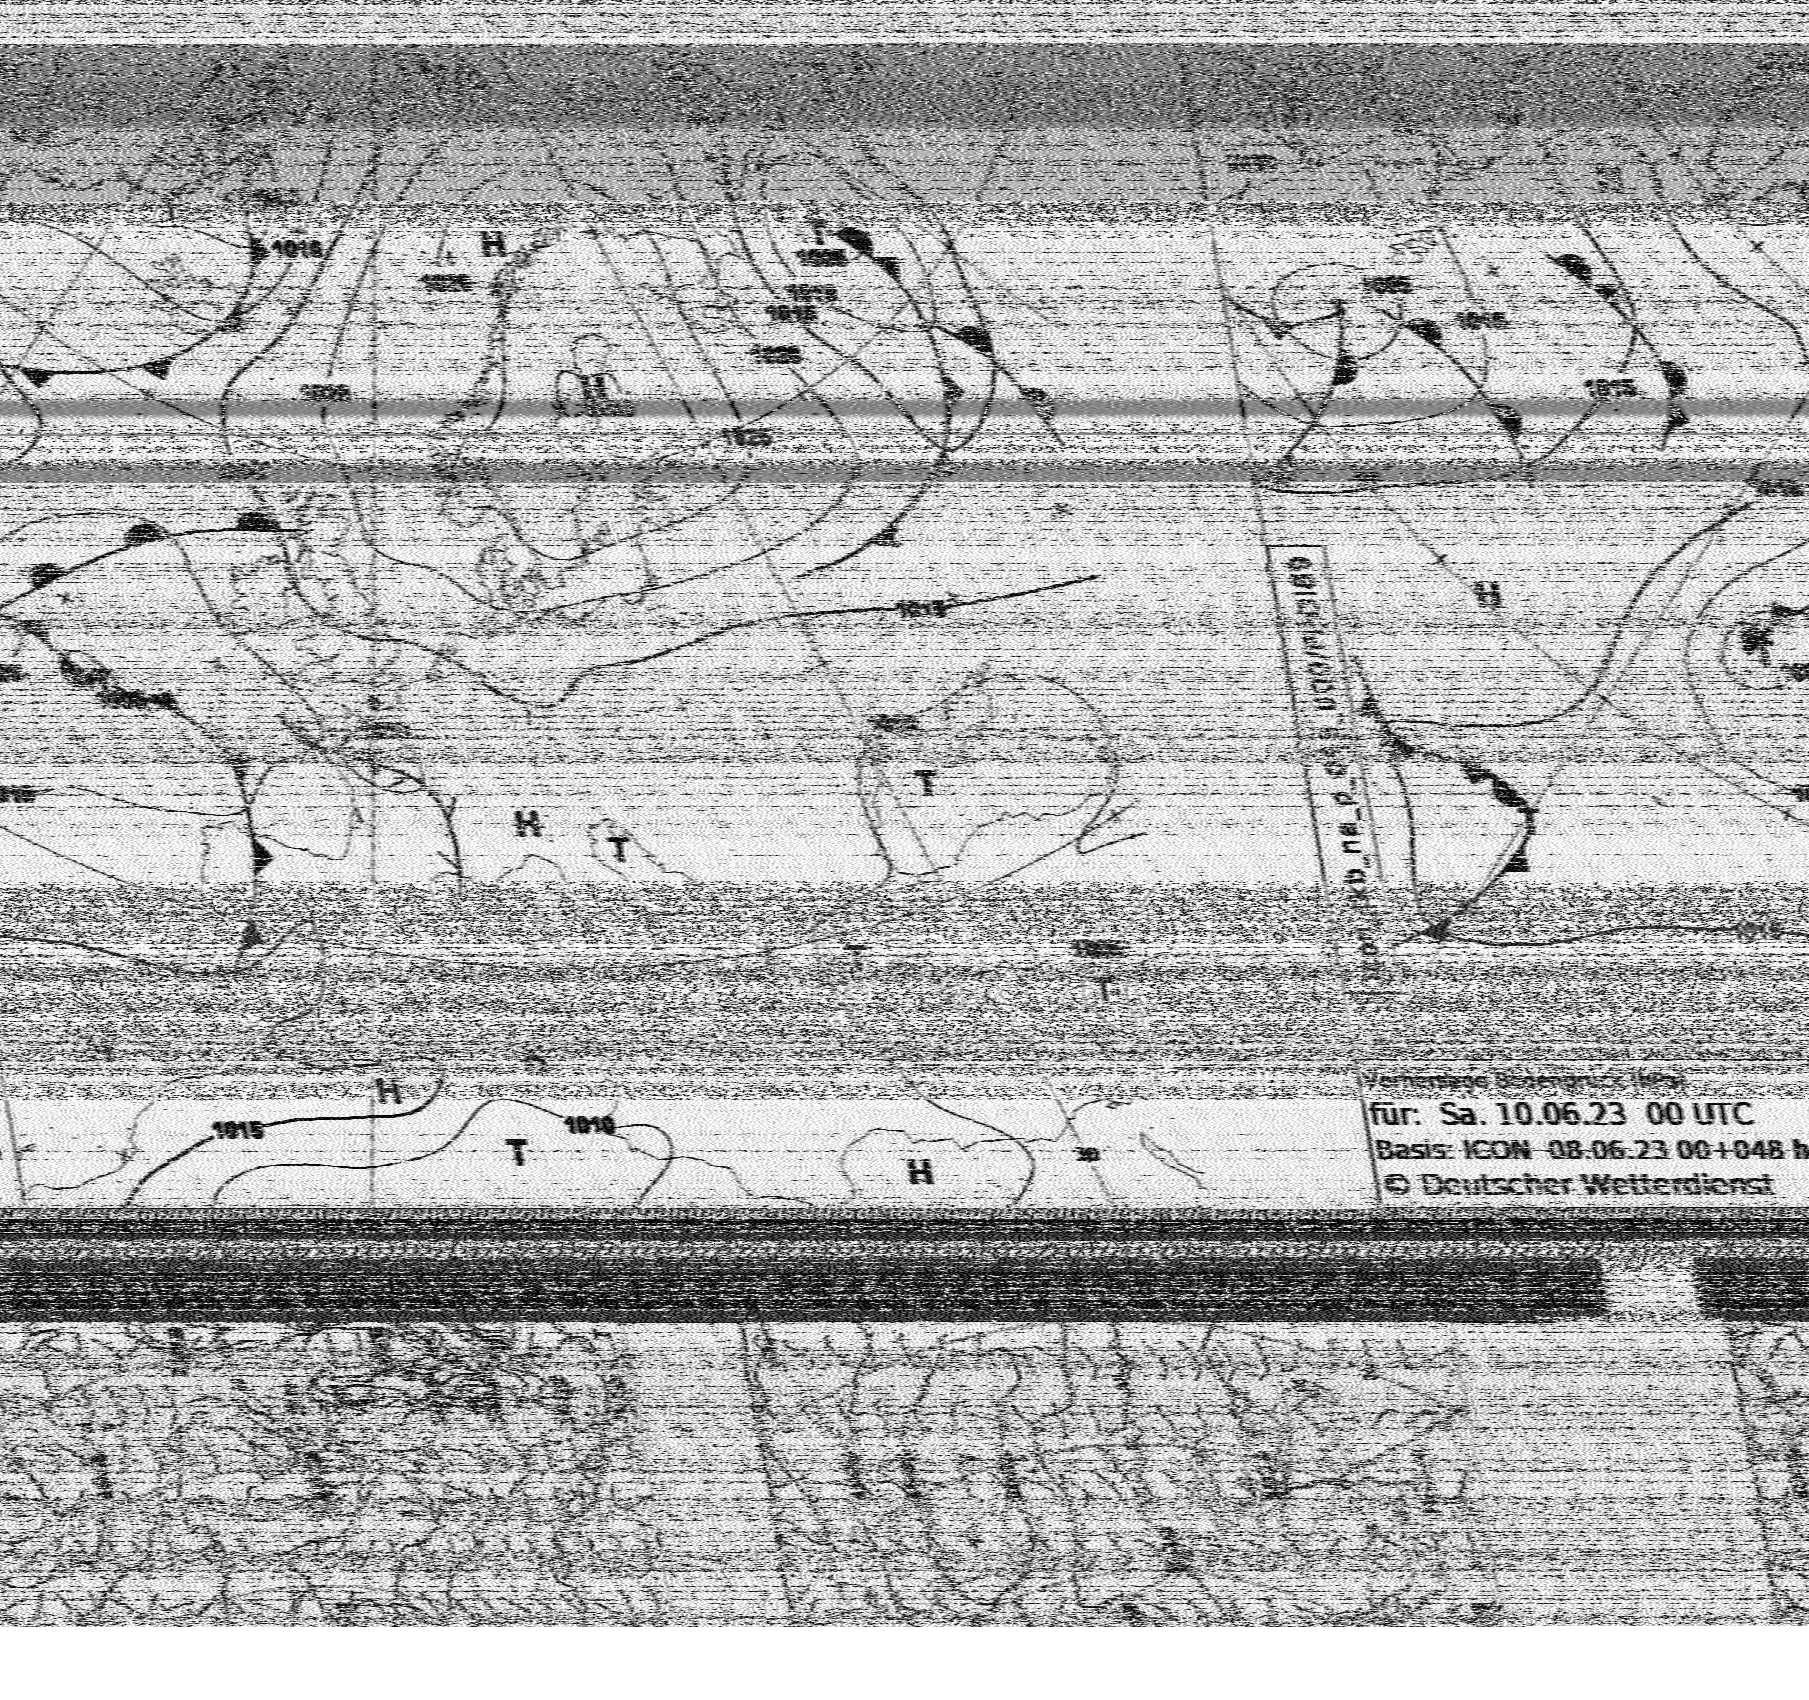
This is a radio fax transmitted by the Deutscher Wetterdienst (DWD), which is more than 1000 kilometers away from where I live and captured the broadcast.
At some later point I got a Ham it Up Plus Upconverter, which you can use in combination with your RTL-SDR dongle for short-wave listening.
Then an Airspy R2 with a Spyverter R2. Compared to RTL-SDR, the Airspy R2 is the better choice, at least to me. I was getting better reception with the Airspy, than I was getting with the RTL-SDR dongle.
I should also mention that I live in Sofia, which is the capital of Bulgaria. I also live in an apartment, which means that I don’t have much spare space to practice my hobby. I can’t just install an antenna pole on the balcony here or spread out some long antenna wires across the buildings. So I have to plan things a bit.
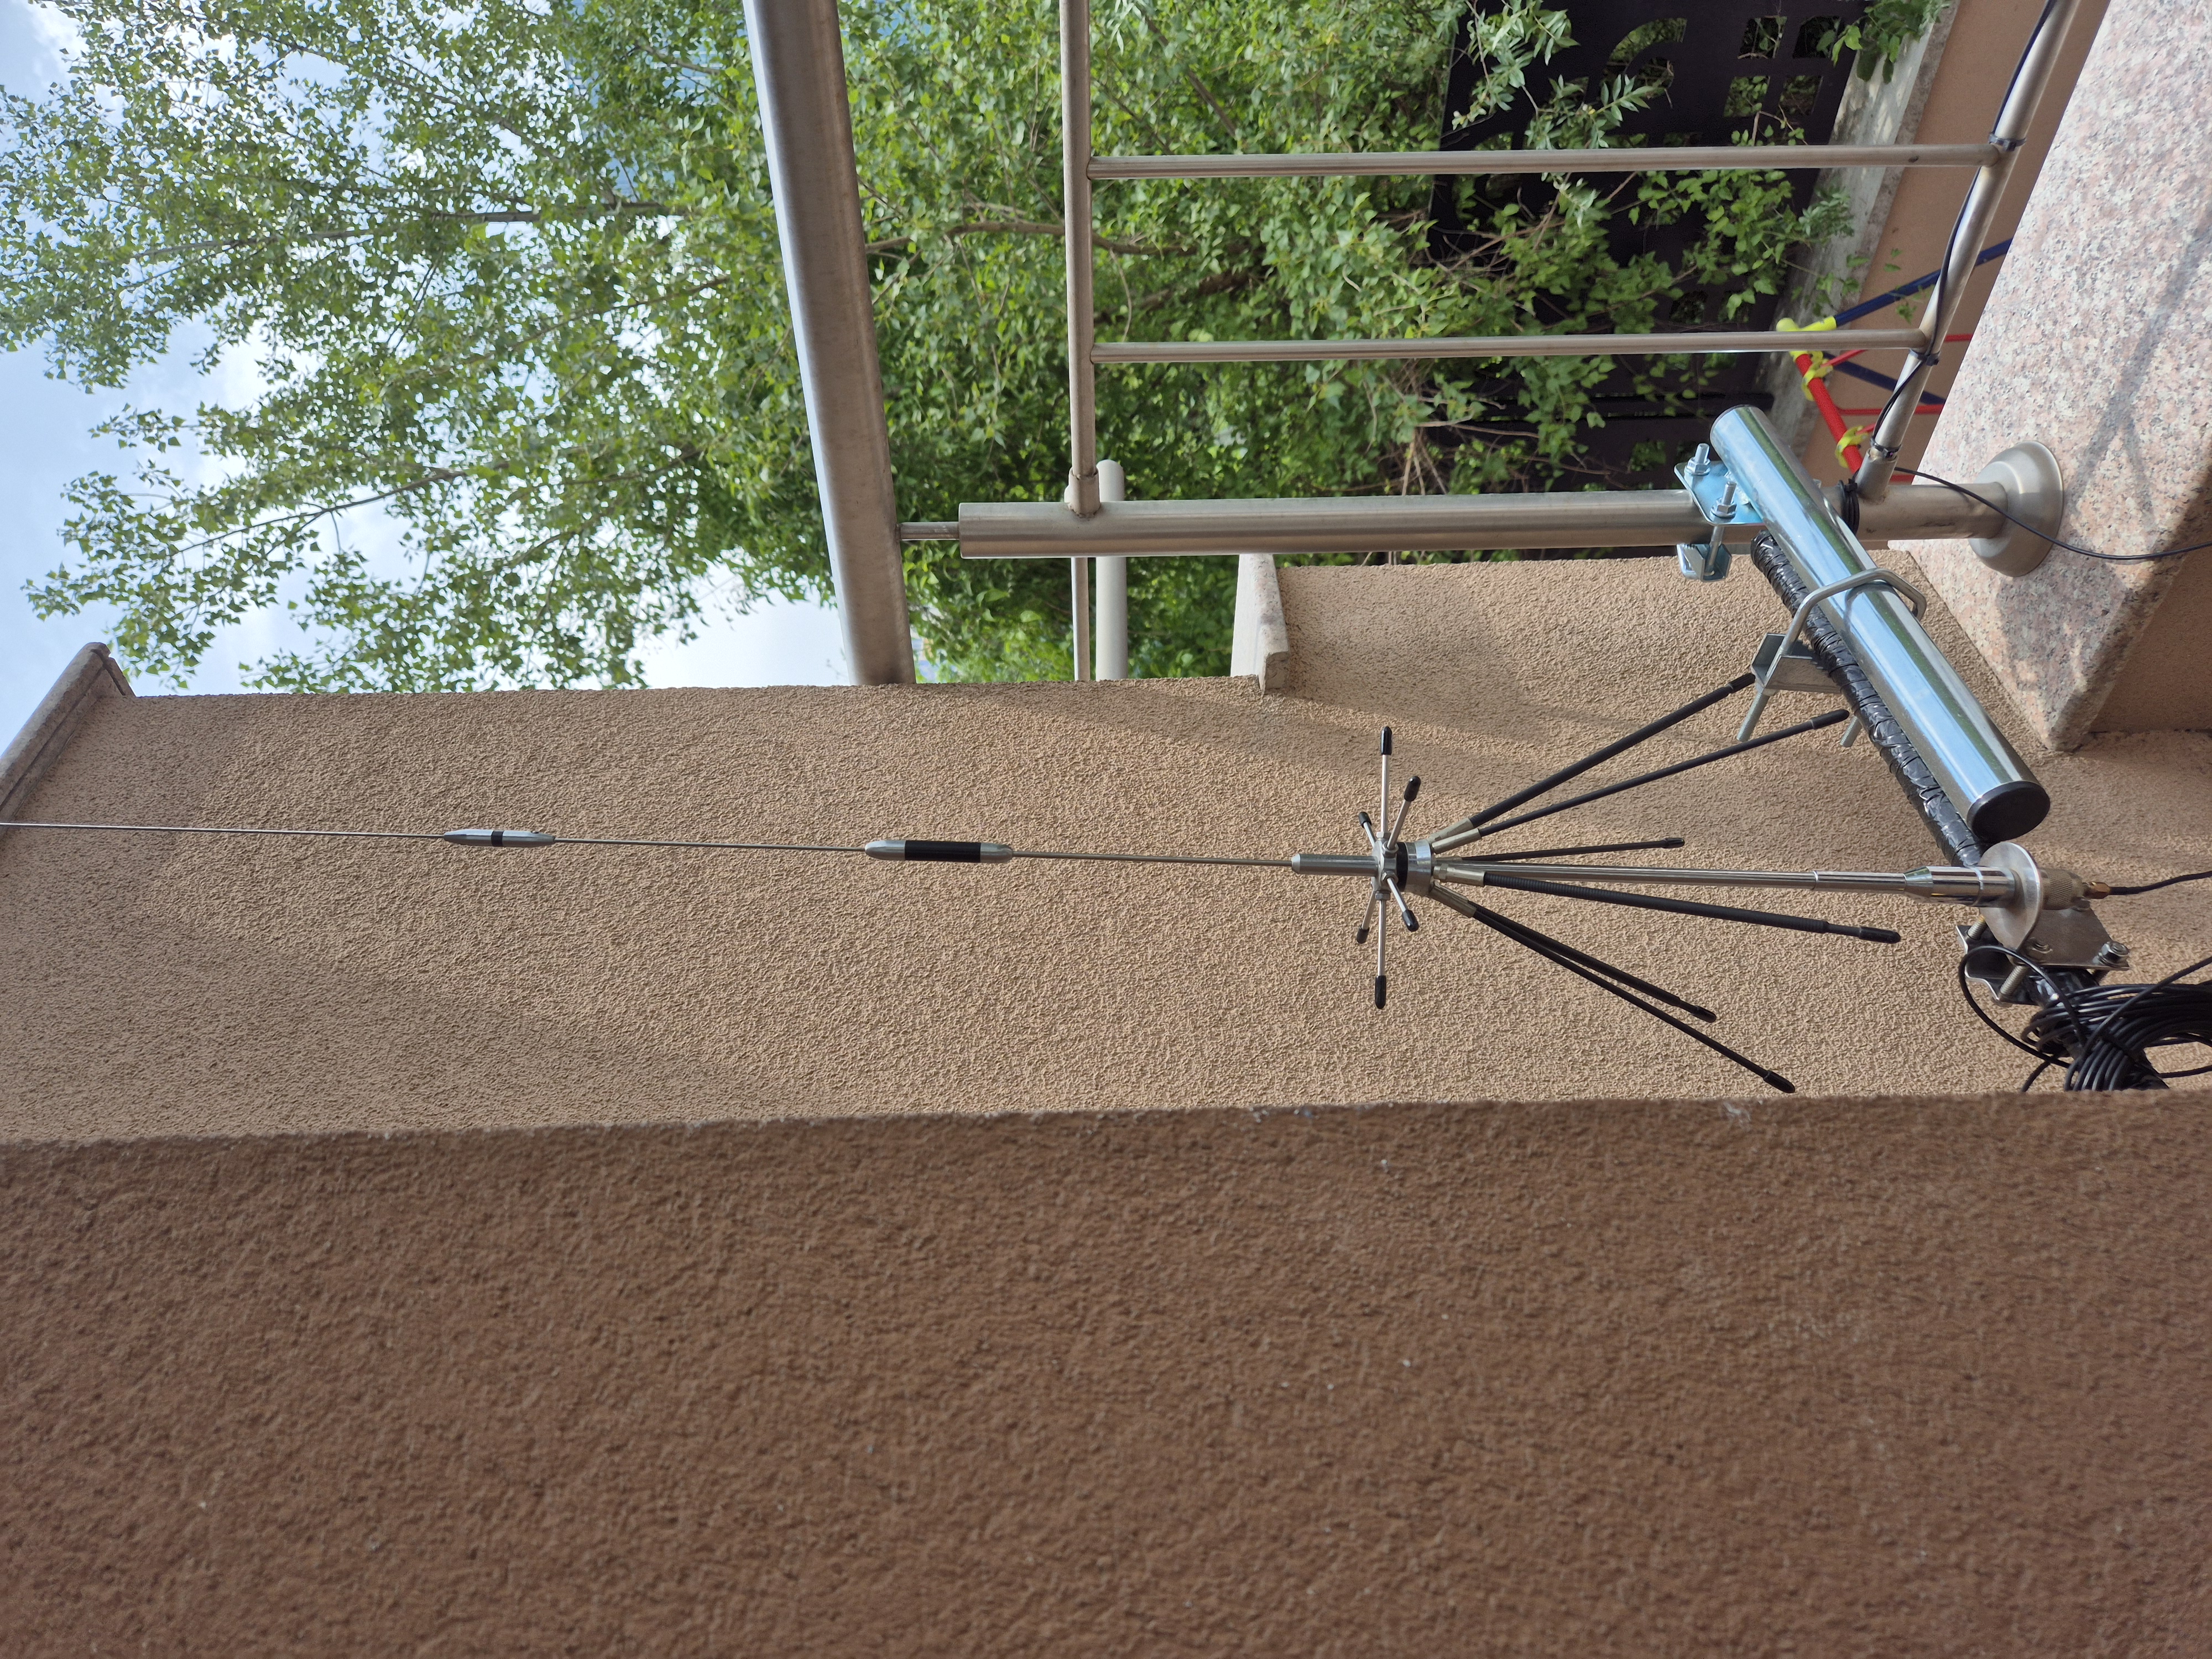
I’m using one GRA-D220 144/440/900/1200MHz Mini Discone Antenna, which is a multi-band antenna and is good enough for listening on 2m and 70cm bands.
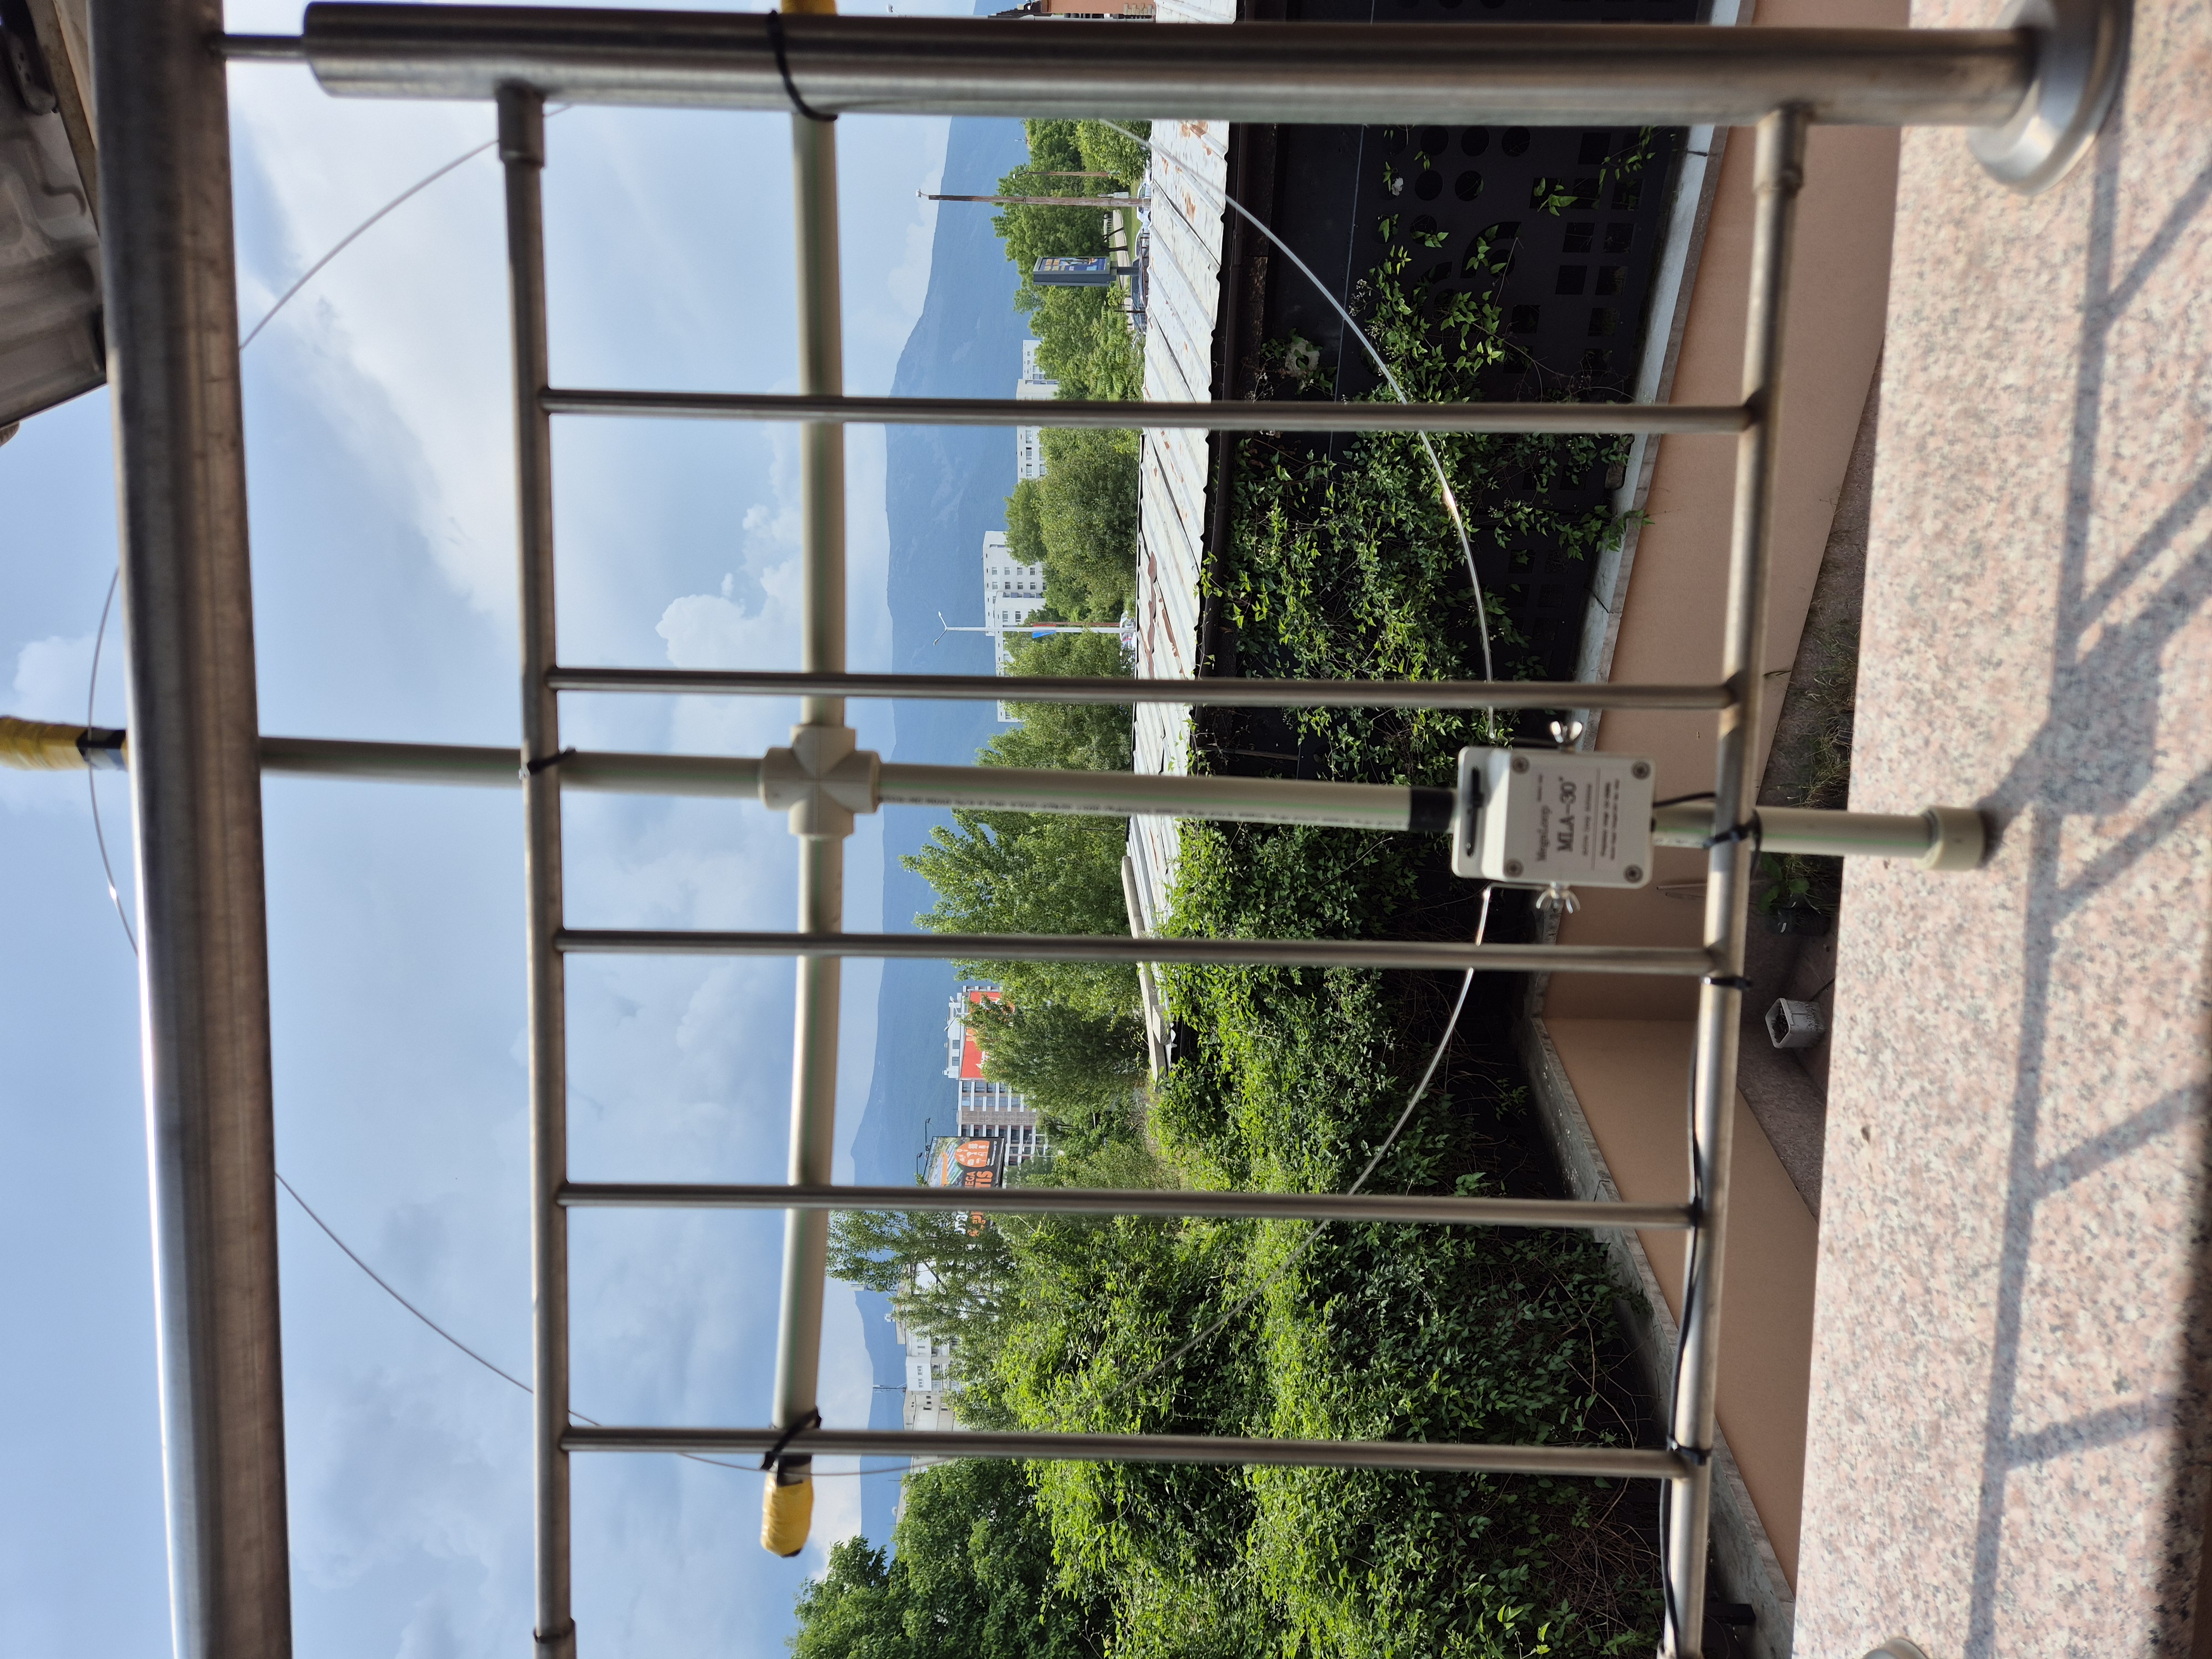
The other antenna I use is the MLA-30+ Loop Antenna,0.5-30MHz Active Receiving Antenna, which is used for short-wave listening.
One of the challenges I’ve always had with my SDR setup is that each time I wanted to start it up and just scan through the frequencies I had to take out the SDR receivers, get the long coax cable from the balcony and take it inside the room with me, connect it to the SDR, and then plug into the computer. This takes time, then I have cables crossing the room, and later I’ll have to undo everything I did once I’m done with it.
I managed to save myself some time by mounting the SDRs on a wooden plate, which I then mounted next to my computer, but still the problem with dragging the antenna cables with me inside the room was bugging me. And drilling holes through the wall was not an option.

This setup worked well for some time, but it was about time to take things to the next level.
Using rtl_tcp allows you to stream your SDR over the network, so if you have an SDR running on a remote location, you could connect to it via the network from a remote client. That means I could just leave the SDRs in a waterproof box on the balcony and then connect to them over the network. And that also means no more cables running across the room. I could also access my SDRs from elsewhere by simply connecting to my home network via WireGuard. Easy as that.
Okay, so what do I need to get this up and running?
I’ve got the SDRs already, and the antennas, I would also need a computer as well, which I can simply put inside the box with the rest of the SDRs. The obvious choice here is to use a Raspberry Pi, first because of it’s dimensions, and second because it’s powerful enough to serve this purpose.
However, putting all these things in a single box ended up as quite a challenge and eventually I started looking for a new compact SDR, with dual antenna ports, which I could put inside the box along with the Raspberry Pi.
Eventually, I ended with the RSPduo from SDRplay. The RSPduo can operate between 1kHz and 2GHz, which meant that I don’t actually need an upconverter anymore, and that also means less space is required to fit all these components in a single waterproof box.
With all these details out of the way it was time to get some work done.
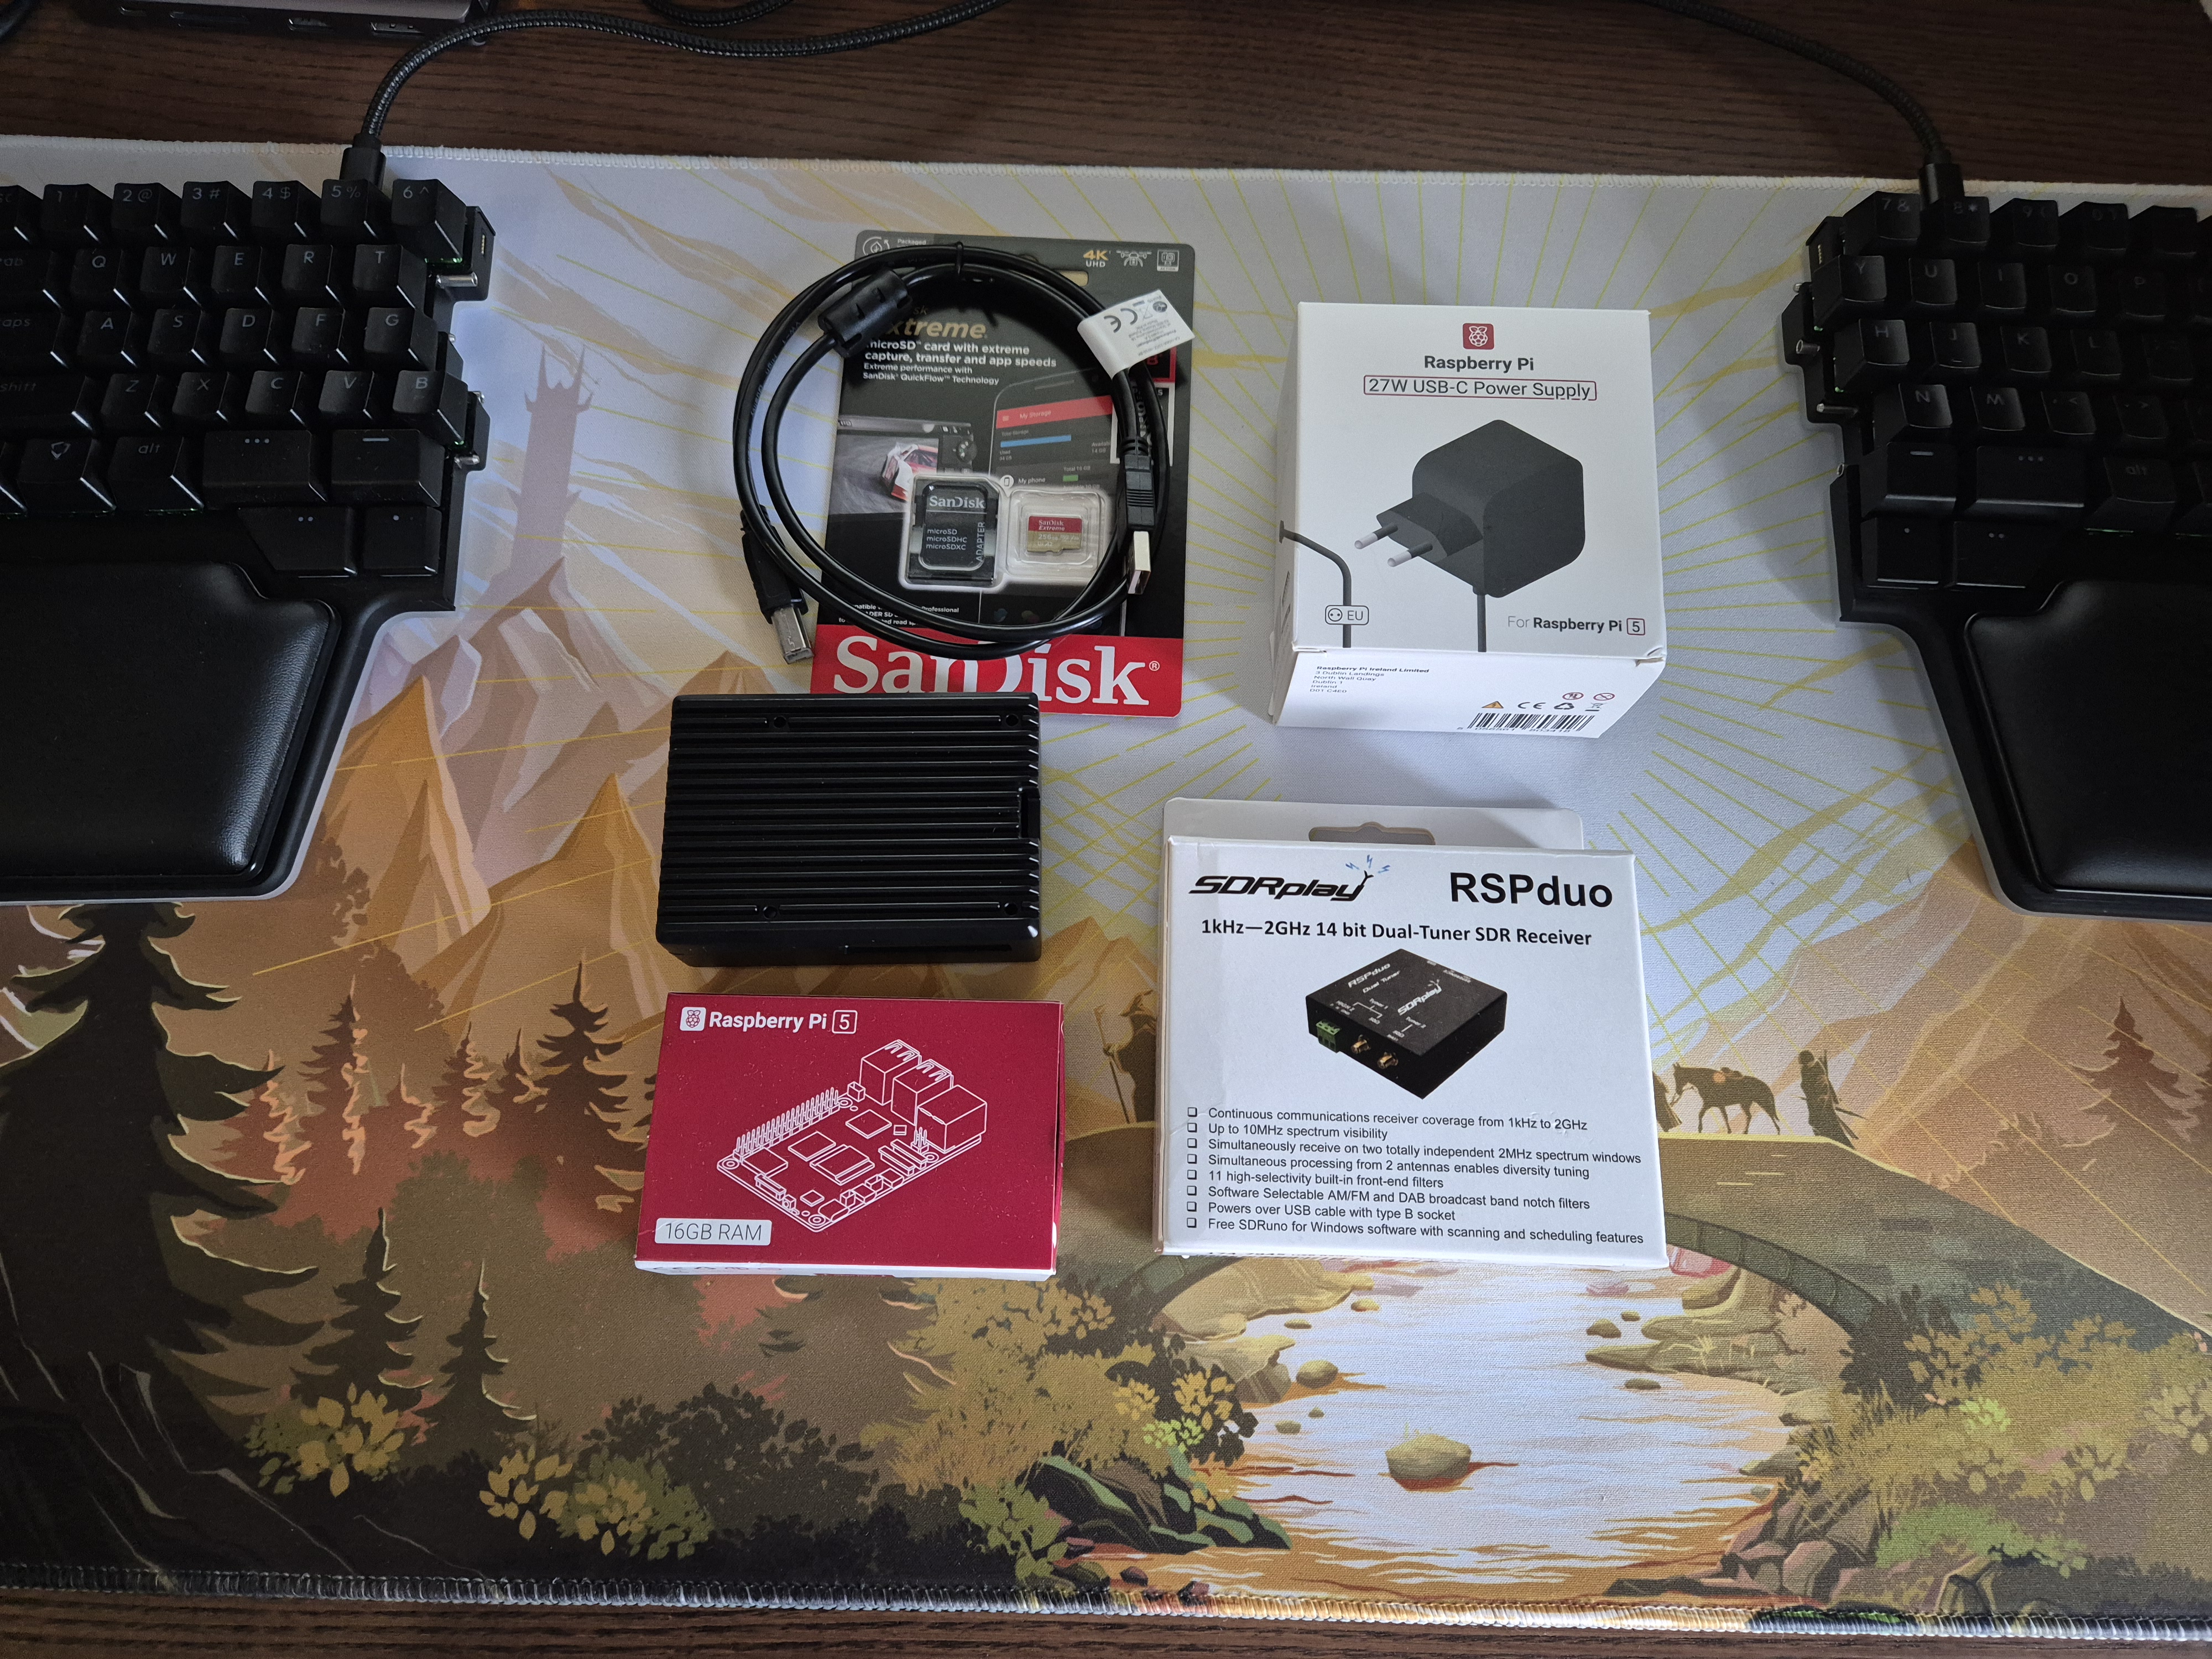
Here’s a list of the components I’ve used.
- Raspberry Pi 5 - 16GB (8GB is more than enough, but I’ve got the 16GB anyways)
- SanDisk SD Card
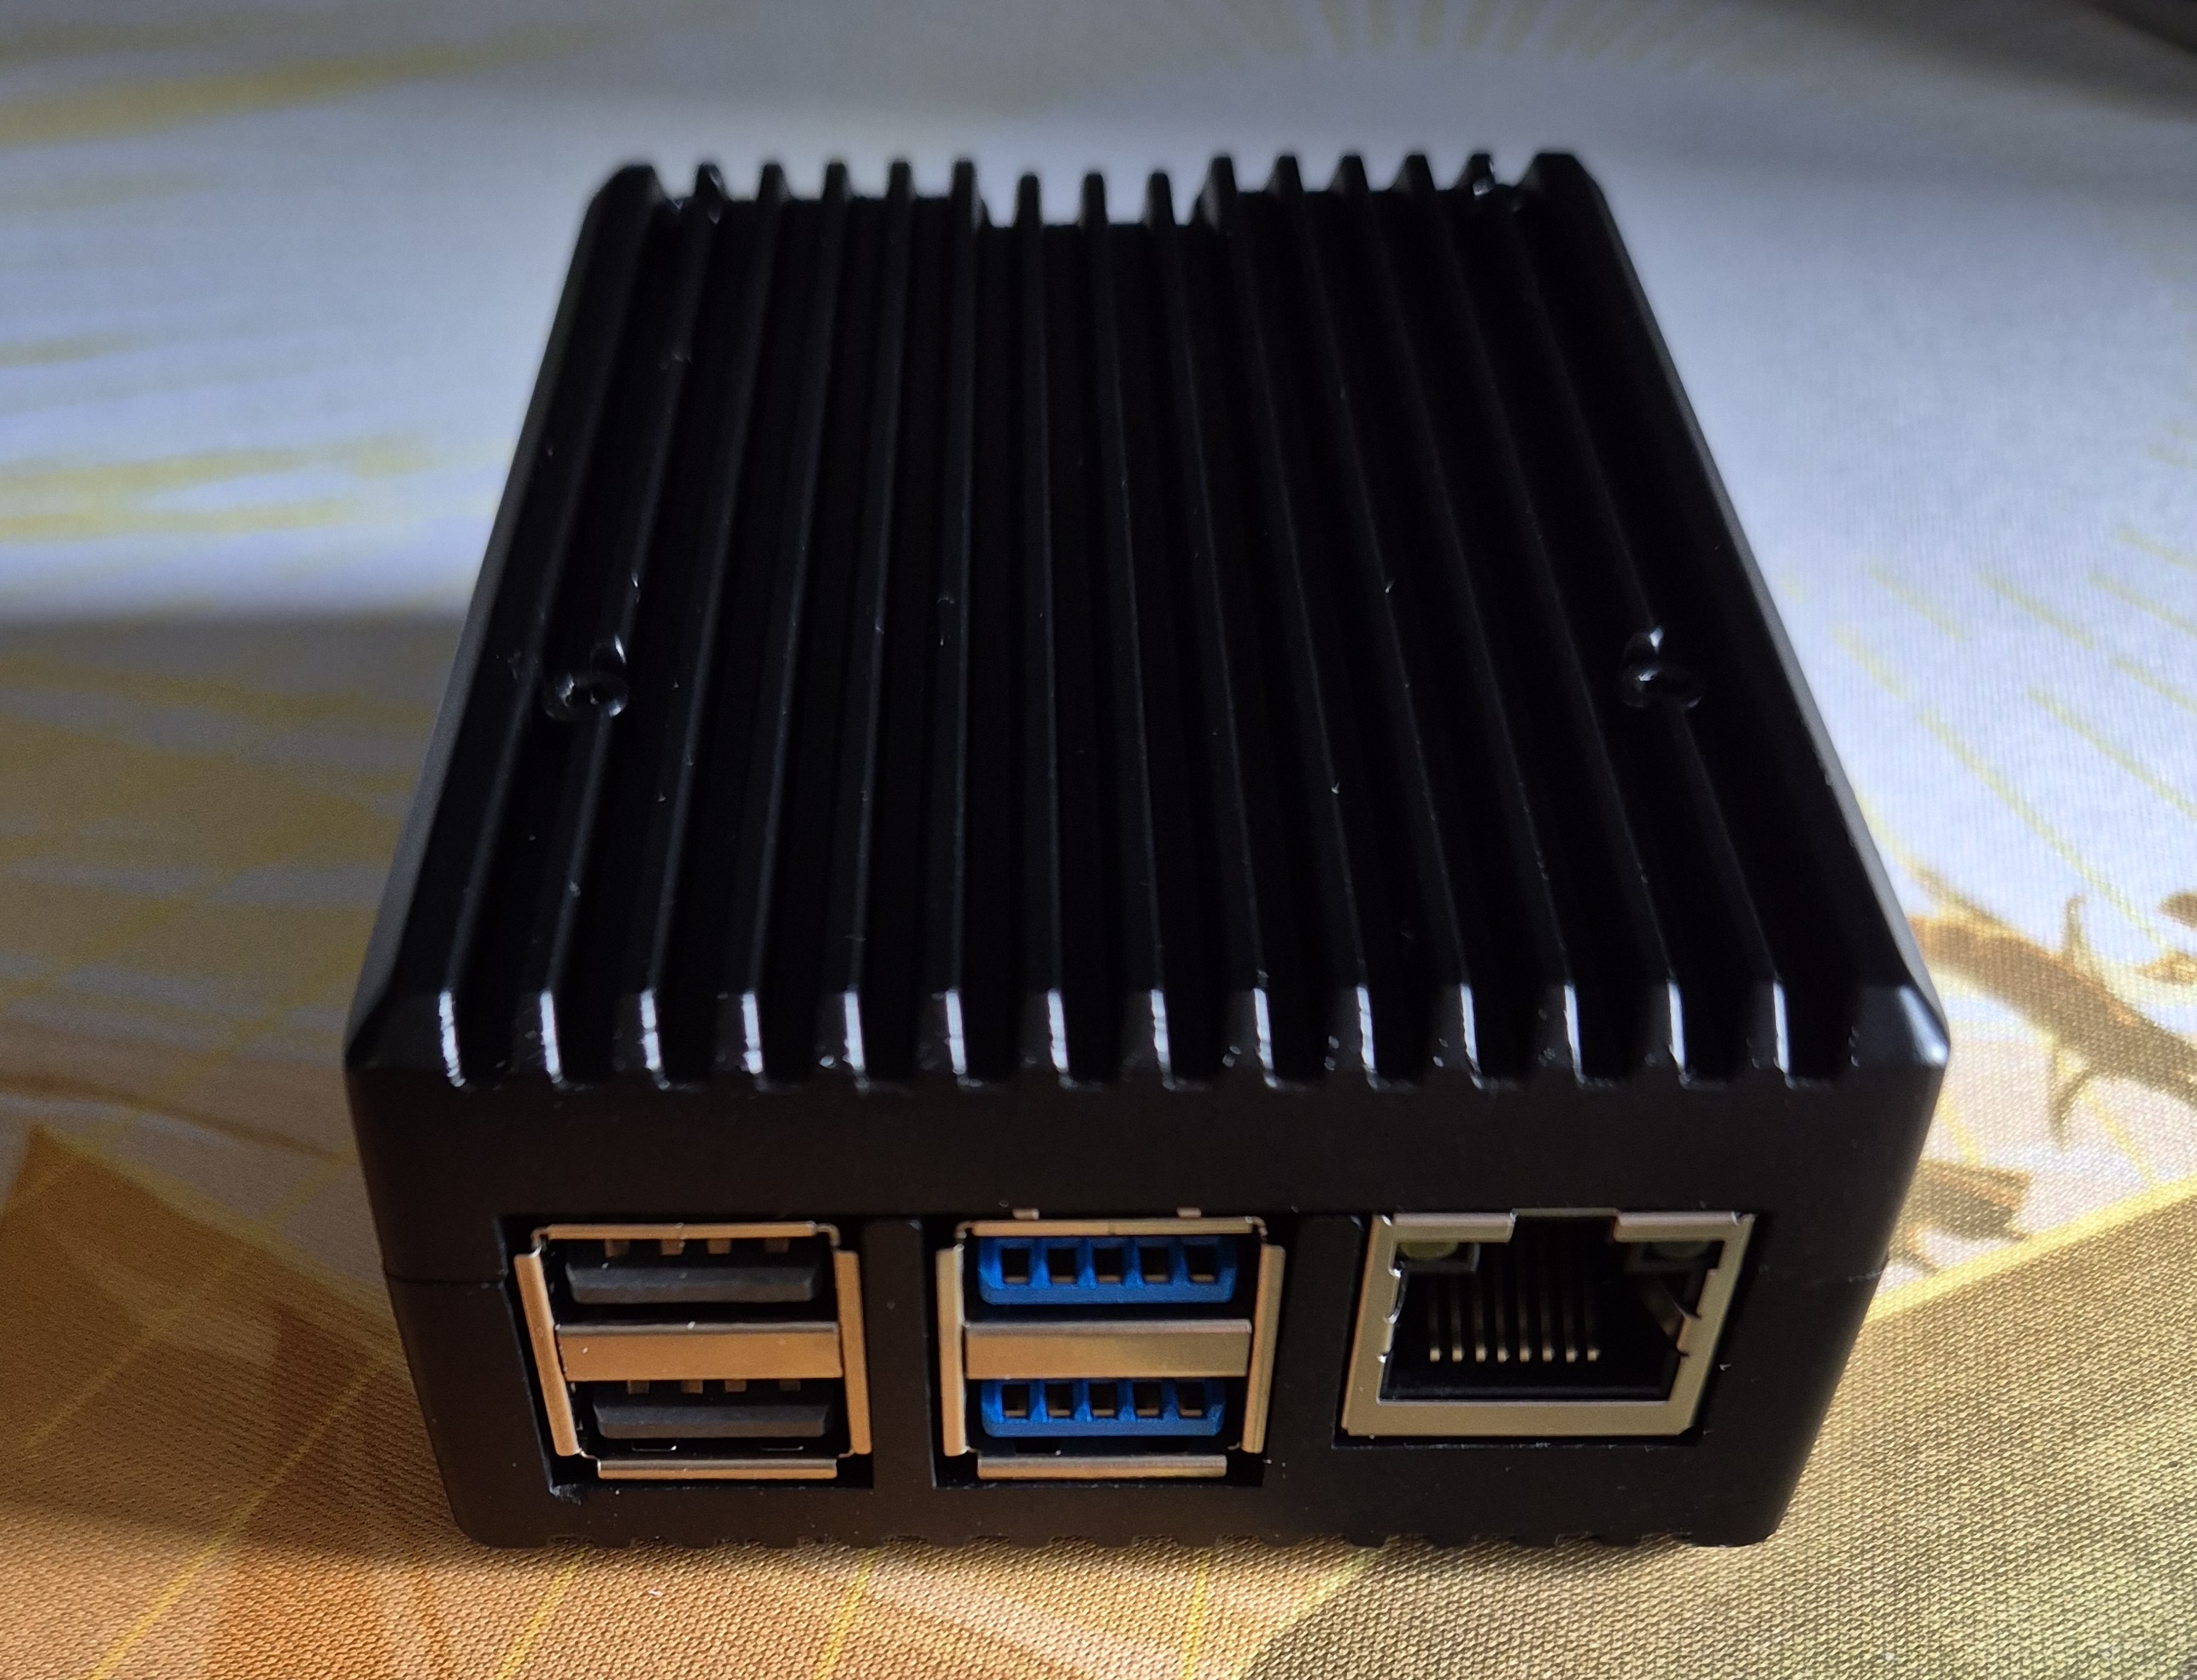
- Aluminium Passive Cooling Case
- Raspberry Pi 27W USB-C Power Supply
- RSPduo
- USB-A to USB-B cable (RSPduo doesn’t come with USB cables)
After putting all these components in a box it looks like this. This is the Raspberry Pi in it’s aluminium case.
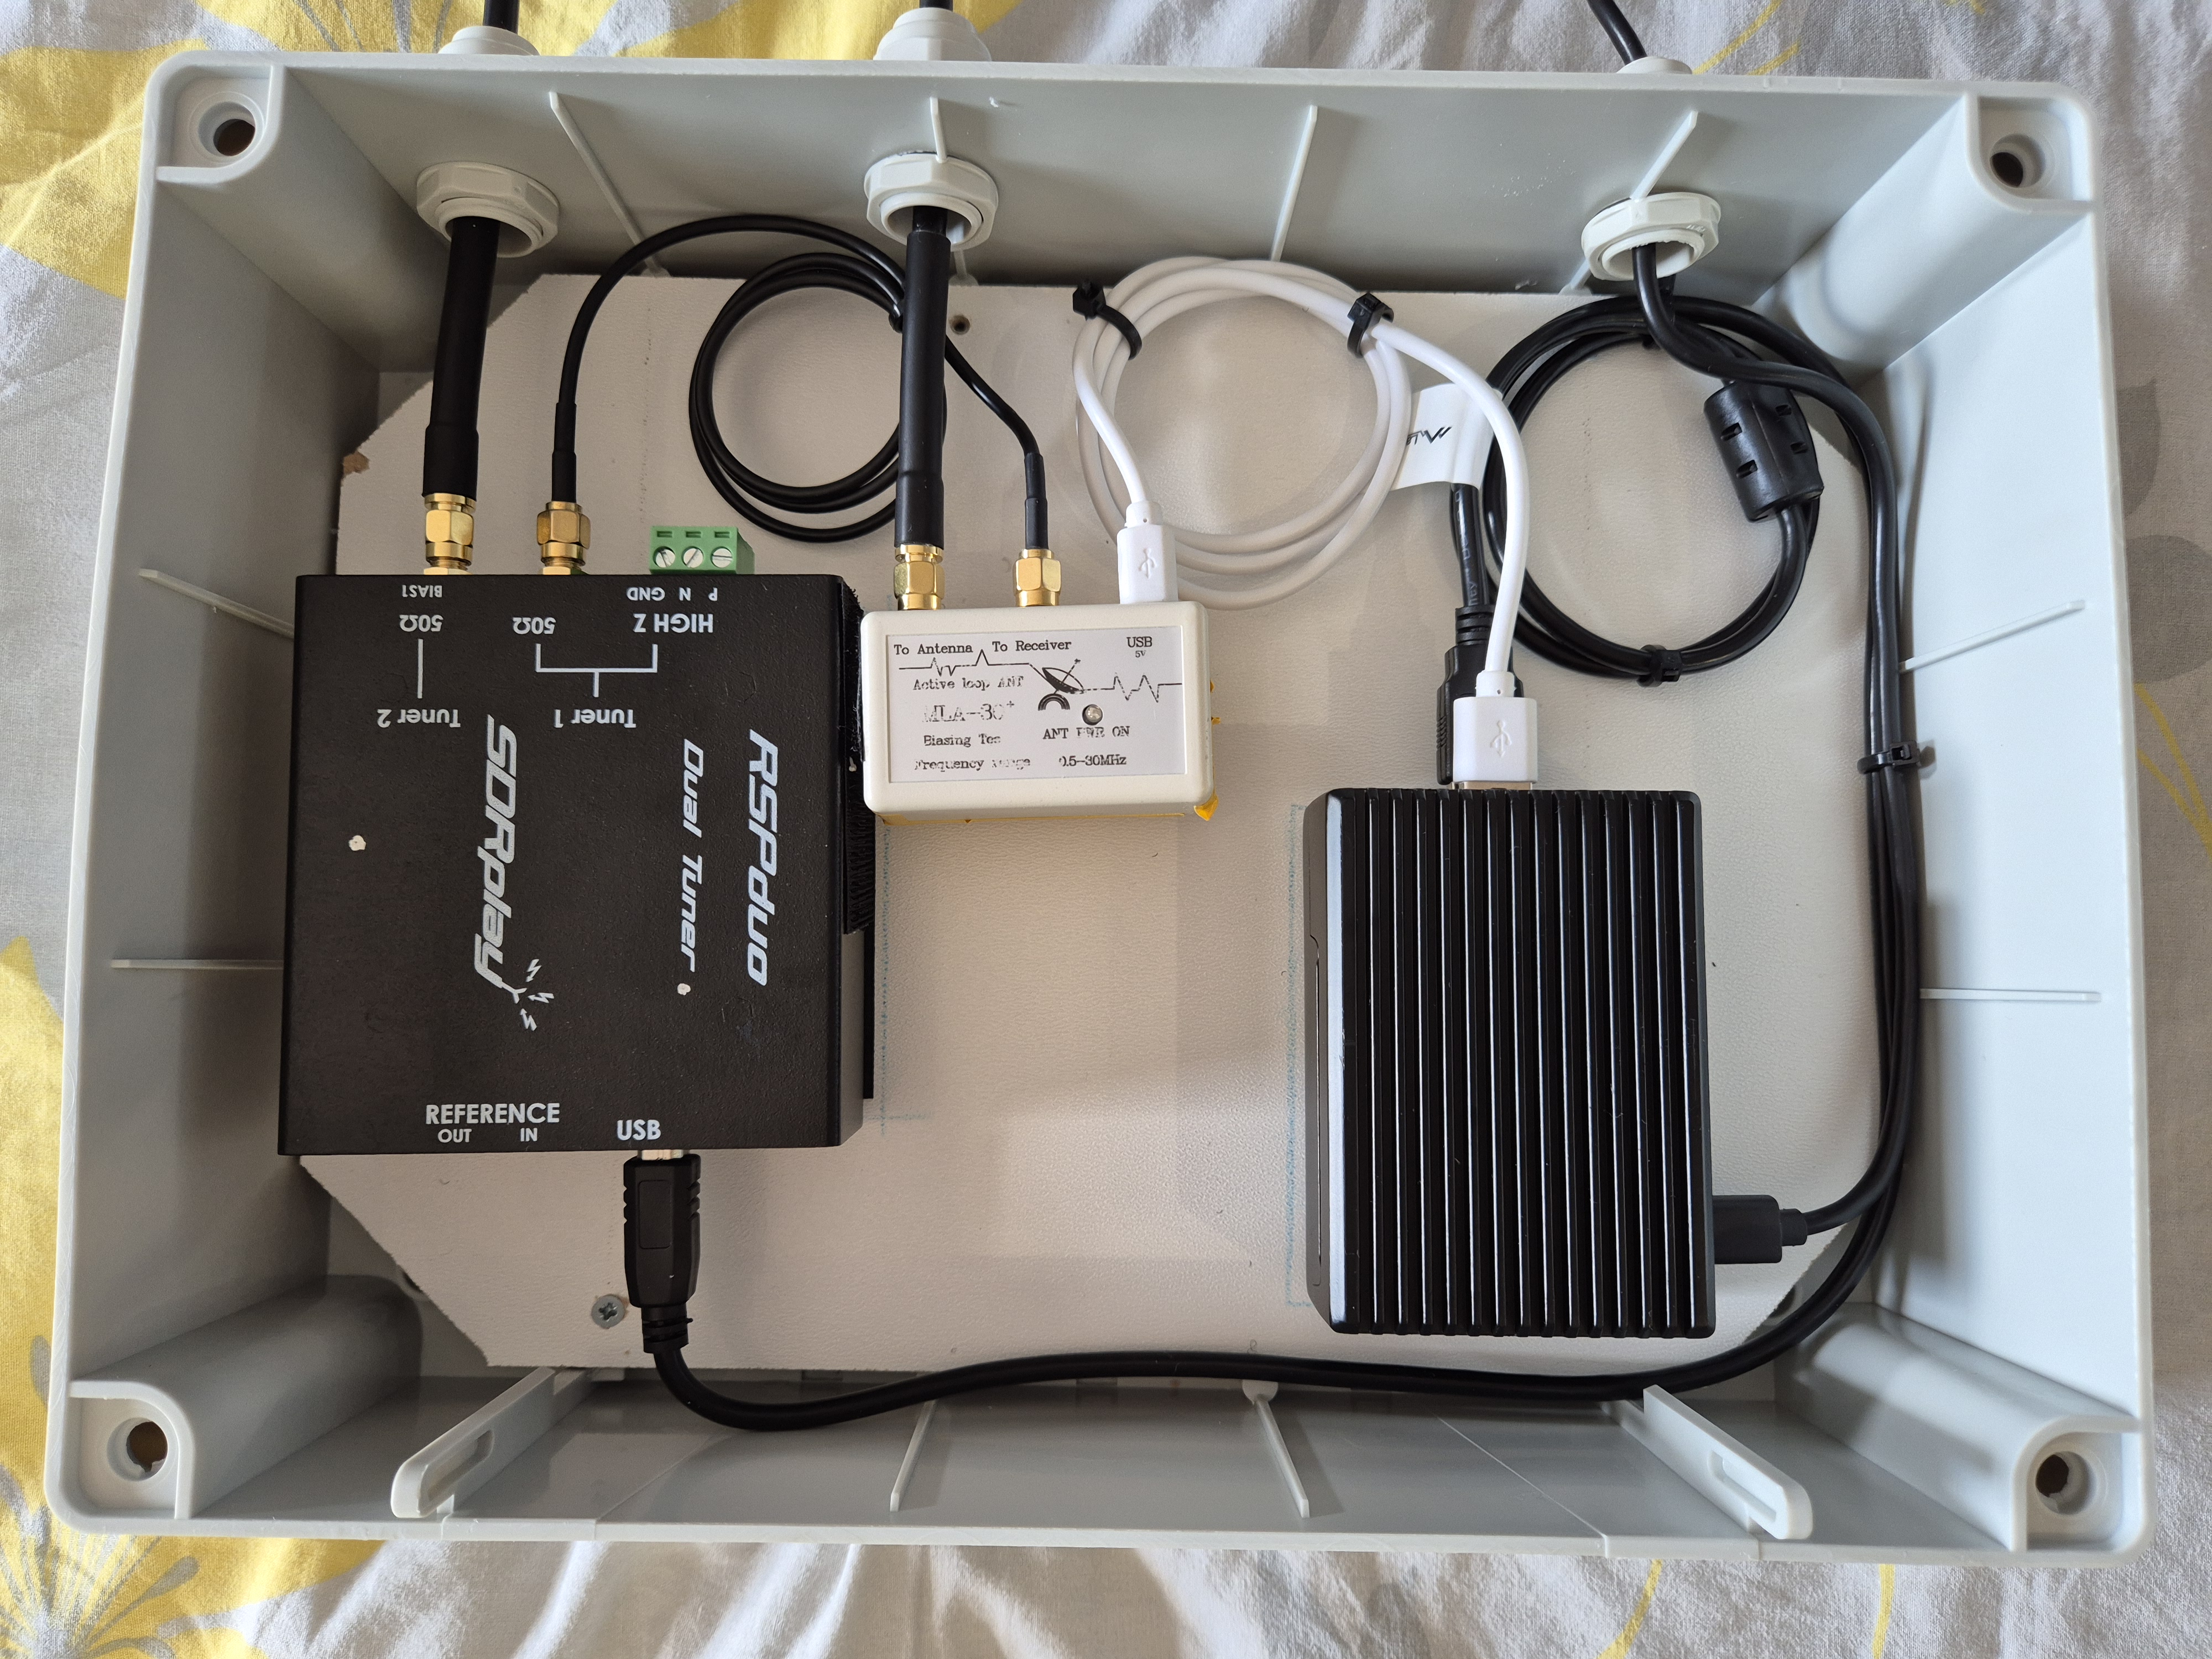
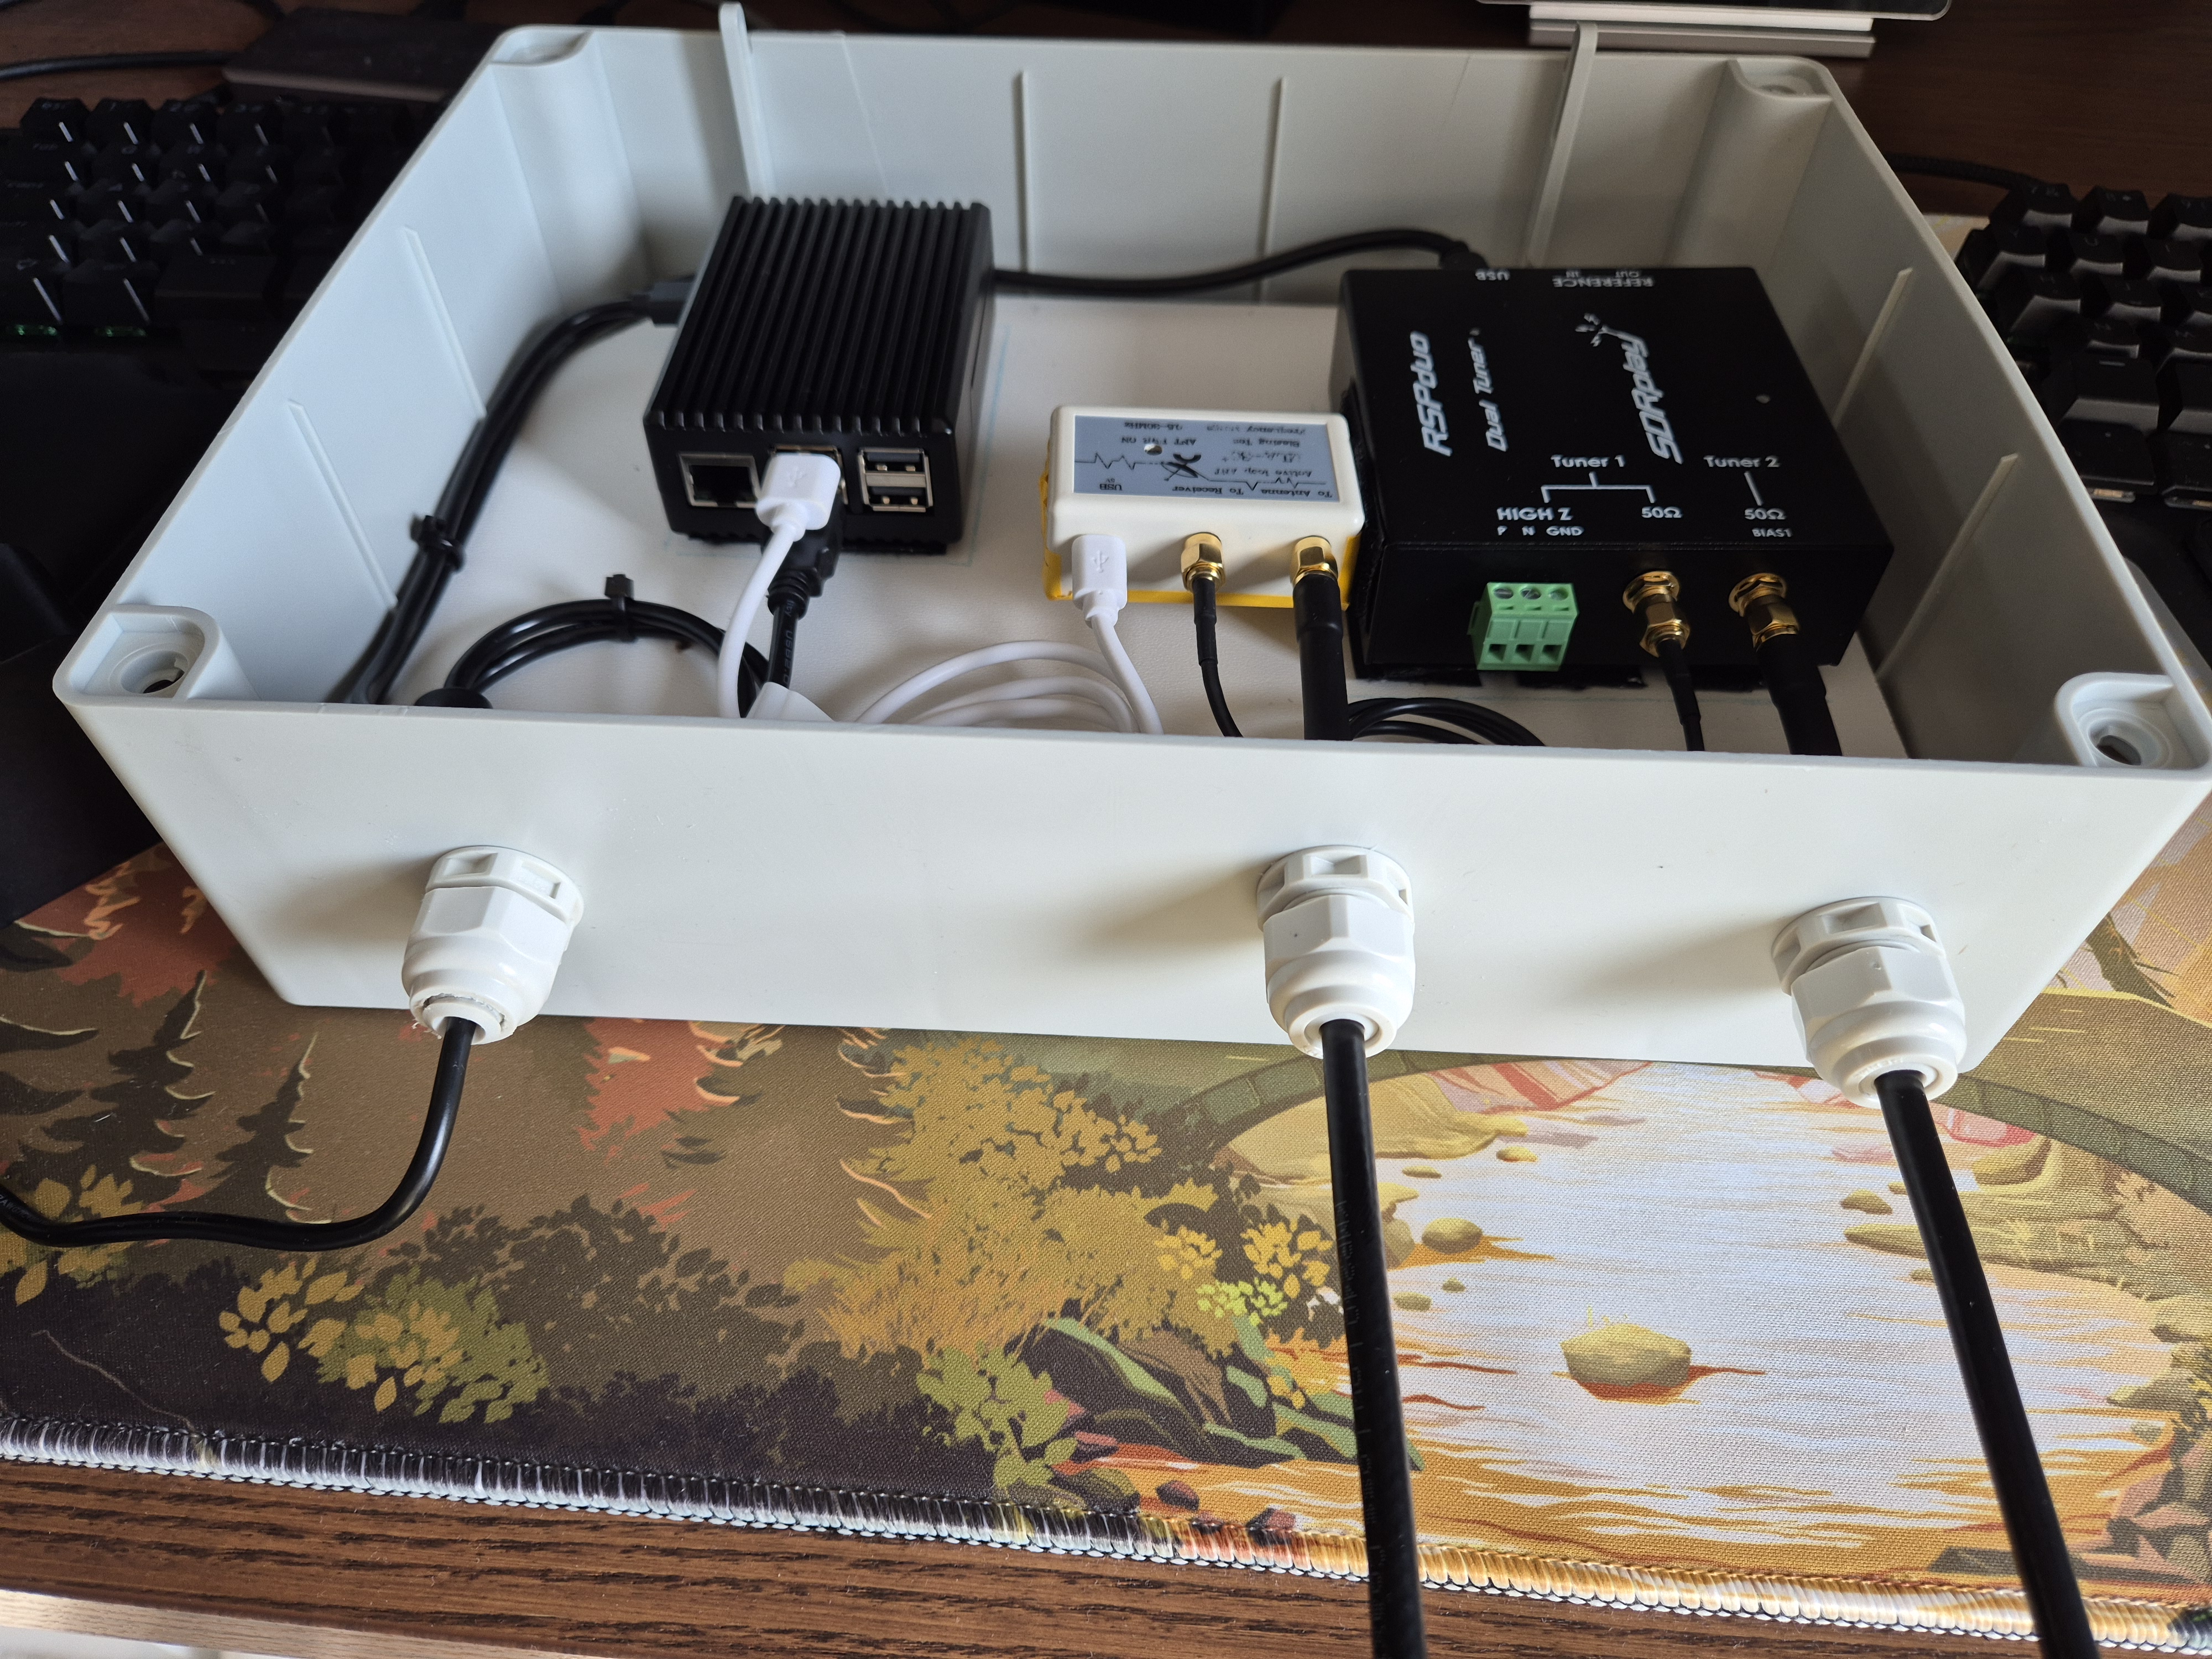
All components packed nicely in the box. I’ve used some velcro strips to get the components mounted in the box, which I think ended up good enough.
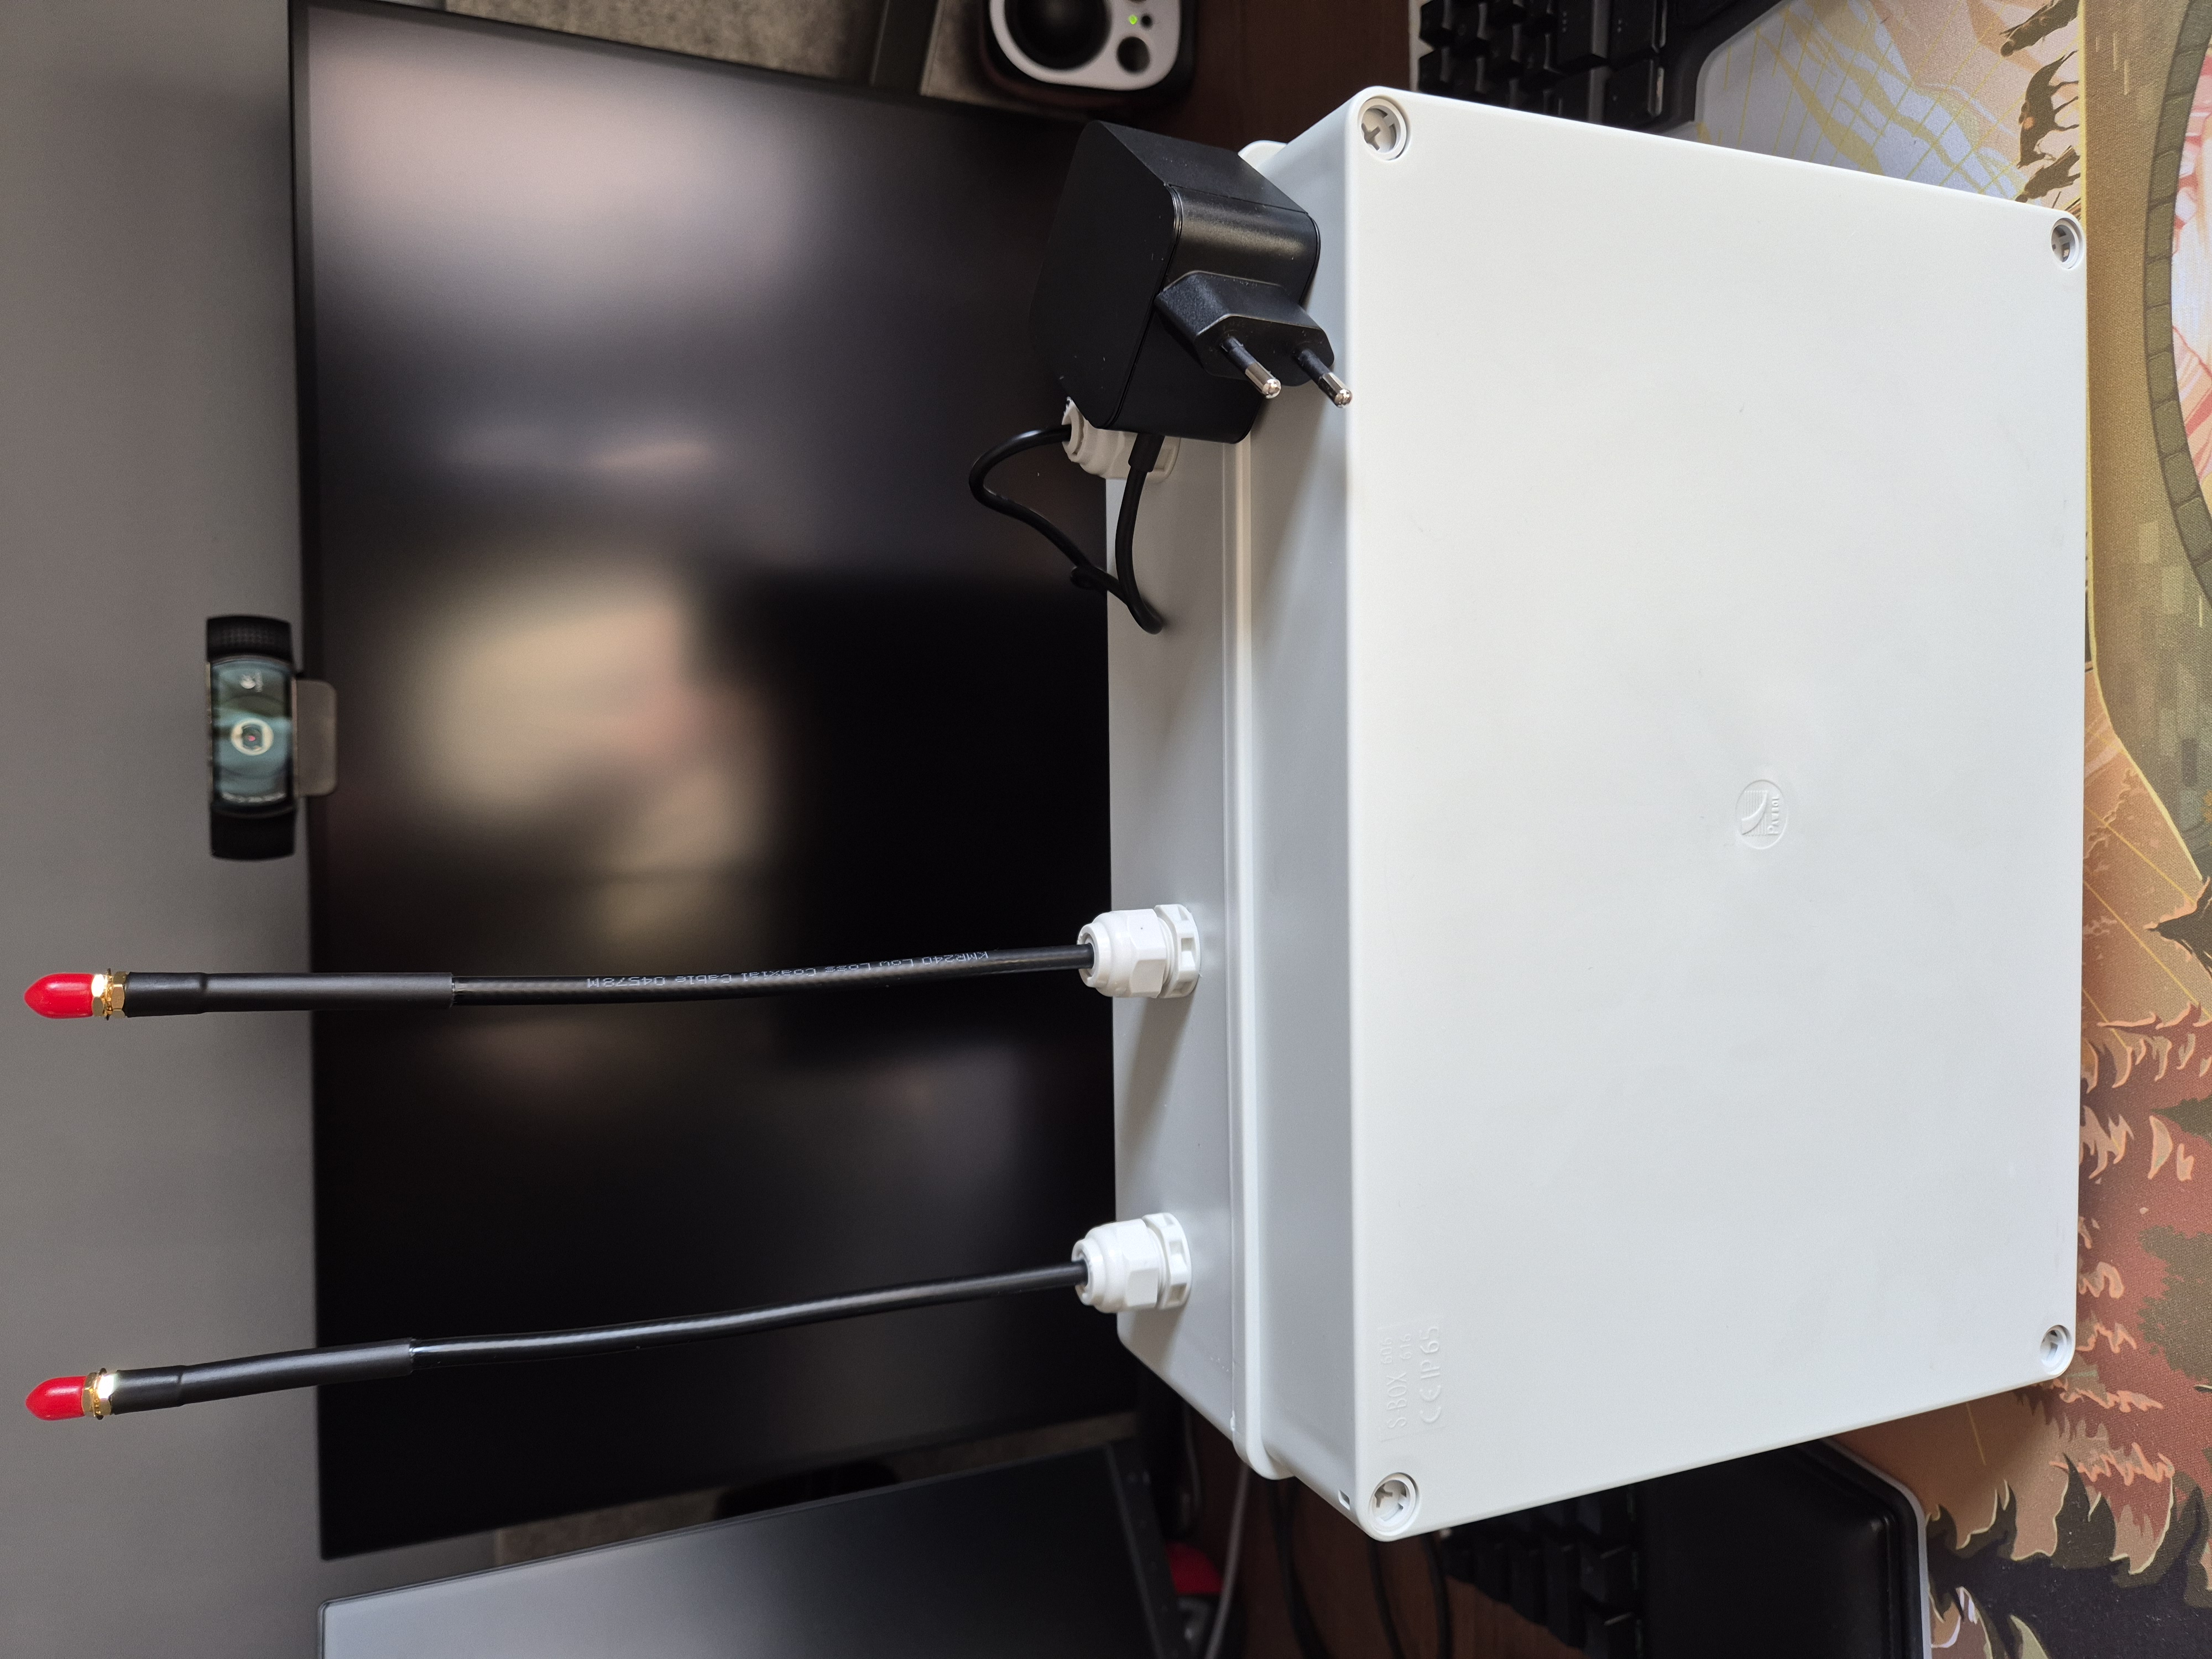
And this is how the box looks like when closed.
Having all the components in place it was time to install the software. The Raspberry Pi runs with DragonOS, which comes with many SDR-related tools pre-installed. In order to install it download the DragonOS_Pi64 image and install it on your SD card using the Raspberry Pi Imager.
Once installed boot your Raspberry Pi and login to it. The default username and password in DragonOS are:
- Username:
ubuntu - Password:
dragon
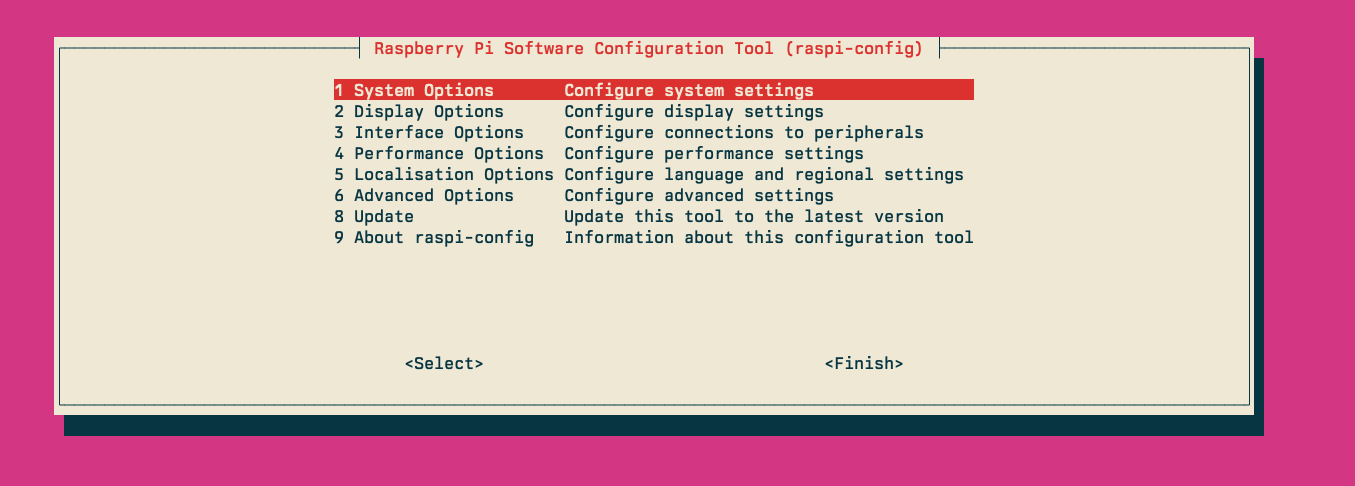
Now it’s time to configure the Pi. You can use the raspi-config tool to
configure various system settings such as hostname, password, WiFi, etc.
Make sure that your system is up-to-date as well.
sudo apt-get update
sudo apt-get upgrade
In case you need any other packages, now is the time to install them as well,
e.g. install command-line editors (mg), sudo(8) access, tmux, lm-sensors
for monitoring the sensors of your Pi, etc.
Once you are done with updating and configuring your Pi we need to reboot it.
sudo reboot
NOTE: In case you are connecting to your Pi using VNC and experiencing strange issues such as blank screen you can follow the steps below to get VNC up and running. If you don’t use VNC at all, or don’t experience such issue, you can safely skip the next few steps, which discuss how to fix the VNC connection to your Pi.
Check the status of the vncserver-x11-serviced service.
ubuntu@sdr01:~$ sudo journalctl -u vncserver-x11-serviced.service
May 21 06:45:45 ubuntu systemd[1]: Started vncserver-x11-serviced.service - VNC Server in Service Mode daemon.
May 21 06:45:46 ubuntu vncserver-x11[2568]: ServerManager: Server started
May 21 06:45:48 ubuntu vncserver-x11[2568]: ConsoleDisplay: Cannot find a running X server on vt1
May 21 06:46:08 ubuntu vncserver-x11[2568]: ConsoleDisplay: Found running X server (pid=3471, binary=/usr/lib/xorg/Xorg)
May 29 11:25:12 ubuntu vncserver-x11[2568]: Connections: connected: 192.168.88.70::63330 (TCP)
May 29 11:25:12 ubuntu vncserver-x11[2568]: Connections: disconnected: 192.168.88.70::63330 (TCP) ([ConnFailed] No configured security type is supported by 3.3 VNC Viewer)
May 29 11:25:32 ubuntu vncserver-x11[2568]: Connections: connected: 192.168.88.70::63335 (TCP)
May 29 11:25:32 ubuntu vncserver-x11[2568]: Connections: disconnected: 192.168.88.70::63335 (TCP) ([ConnFailed] No configured security type is supported by 3.3 VNC Viewer)
May 29 11:26:51 ubuntu vncserver-x11[2568]: Connections: connected: 192.168.88.70::63352 (TCP)
May 29 11:26:51 ubuntu vncserver-x11[2568]: Connections: disconnected: 192.168.88.70::63352 (TCP) ([ConnFailed] No configured security type is supported by 3.3 VNC Viewer)
I was having issues with VNC on my Pi, and from the logs above you can see that as soon as the session is established it is followed immediately by closing the session. Here is how I’ve fixed it on my Pi.
First, stop and disable the VNC services.
sudo systemctl stop vncserver-virtuald.service
sudo systemctl stop vncserver-x11-serviced.service
sudo systemctl disable vncserver-virtuald.service
sudo systemctl disable vncserver-x11-serviced.service
Then remove the realvnc-vnc-server server package.
sudo apt-get remove realvnc-vnc-server
Now we will install tigervnc server instead, which works just fine.
sudo apt-get install tigervnc-standalone-server tigervnc-xorg-extension tigervnc-tools
For tigervnc we need to configure user mappings in
/etc/tigervnc/vncserver.users file.
# TigerVNC User assignment
#
# This file assigns users to specific VNC display numbers.
# The syntax is <display>=<username>. E.g.:
#
# :2=andrew
# :3=lisa
:1=ubuntu
In the config above we have mapped user ubuntu to the :1 display on port
5901.
Create a VNC password for your ubuntu user.
vncpasswd
Type and verify your password. The password will be hashed and stored in
~/.vnc/passwd.
Password:
Verify:
Would you like to enter a view-only password (y/n)? n
A view-only password is not used
Enable and start an instance of the tigervncserver service.
sudo systemctl start tigervncserver@:1.service
sudo systemctl enable tigervncserver@:1.service
You should be able to verify that the VNC server is up and running and it’s already listening for new connections.
ubuntu@sdr01:~$ netstat -tlpan | grep 5901
(Not all processes could be identified, non-owned process info
 will not be shown, you would have to be root to see it all.)
tcp        0      0 127.0.0.1:5901          0.0.0.0:*               LISTEN      248895/Xtigervnc
tcp6       0      0 ::1:5901                :::*                    LISTEN      248895/Xtigervnc
Note that it listens on localhost interface only, which is fine with me, since
I don’t want it exposed anyways. In order to access the VNC server I’m doing it
over an SSH tunnel.
ssh -L 5901:localhost:5901 sdr01.internal
Now we can start up a VNC client and connect to localhost:5901 using the
password we’ve set before with vncpasswd.
For additional information about TigerVNC, please refer to the TigerVNC Arch Linux Wiki page.
With the VNC issues out of the way, we can proceed and install the SDRplay API and SDRconnect on our Pi.
You can also watch this nice intro about SDRconnect in this video here.
At the time of writing this document the version of SDRconnect I’m installing is
release 83273bcd8, which was downloaded from the SDRplay website.
ubuntu@sdr01:~$ wget https://www.sdrplay.com/software/SDRconnect_linux-arm64_83273bcd8.run
ubuntu@sdr01:~$ ./SDRconnect_linux-arm64_83273bcd8.run
Once SDRconnect is successfully installed you should see output similar to the one below.
Press y and RETURN to accept the license agreement and continue with
the installation, or press n and RETURN to exit the installer [y/n] y

Testing for arm64 compliance.......Done

Checking for package tools...apt found

Checking for libusb-1.0...found
Checking for libasound2...found
Checking for libuuid1...found
Checking for libudev1...found

udev directory found, adding rules for RSPs...Done

SDRconnect will be installed into /opt/sdrconnect
To change the installation path, enter the new location at the prompt.
Installation location [/opt/sdrconnect]:

SDRconnect will be installed to: /opt/sdrconnect
To start the installation press y and RETURN or n and RETURN to exit [y/n] y
Installing to /opt/sdrconnect.............Done

Create a system menu entry to launch SDRconnect client? [y/n] y
Installing menu entry......Done

Checking SDRconnect Server Service status...not installed

Do you want this installation to operate the SDRconnect server as a continuous
background service? [y/n] y
SDRconnect Server Service options file installed.
 --> /opt/sdrconnect/server_options.txt

SDRconnect Server Service file created.
Installing service... (may take a while, please wait...)
SDRconnect Server Service started.

To change the server service command line options, edit the
/opt/sdrconnect/server_options.txt file and start the service again.

To stop and start the service, use...
      sudo systemctl stop sdrconnect
      sudo systemctl start sdrconnect

To disable the service (e.g. to stop the service starting after a reboot) and
then enable it again, use...
      sudo systemctl disable sdrconnect.service
      sudo systemctl enable sdrconnect.service

Make a note of this information!
Important Note: When the server service is running, the RSP that it is using
cannot be used by another application on this host. You will need to stop the
server service to make that RSP available to other applications.

Press any key to continue

To add the new installation folder to your search path, please add the following
line to the bottom of your ~/.bashrc file and restart your terminal window...

export PATH=/opt/sdrconnect:$PATH

Warning:
System files have been changed on your system, so it is recommended that you
reboot your system for correct operation.

SDRconnect installation finished.
Add /opt/sdrconnect to your PATH as mentioned in the output above.
echo 'export PATH=/opt/sdrconnect:$PATH' >> ~/.bashrc
Time to install SDRplay RSP API.
ubuntu@sdr01:~$ wget https://www.sdrplay.com/software/SDRplay_RSP_API-Linux-3.15.2.run
ubuntu@sdr01:~$ ./SDRplay_RSP_API-Linux-3.15.2.run
This is what the output from the install script looks like.
Verifying archive integrity... All good.
Uncompressing SDRplay RSP API Install Package V3.15 (installer v2)
SDRplay API 3.15 Installation
=============================

This installation requires to either be run as root, or it will request root
access through the sudo program. This is required to install the daemon into
the system files.

Press RETURN to view the license agreement

...

Press y and RETURN to accept the license agreement and continue with
the installation, or press n and RETURN to exit the installer [y/n] y

A copy of the license agreement can be found here: /home/ubuntu/sdrplay_license.txt


Architecture reported as being 64 bit
System reports 64 bit files found
System is also setup to produce 64 bit files
Architecture reports machine as being arm64 compliant


Checking for root permissions. You may be prompted for your password...

The rest of the installation will continue with root permission...


This API requires the following system dependencies...
libusb and lidudev
If the installer cannot detect the presence of these, you will
have the option to continue and you will need to install them

Checking for package tools...
apt found

Checking for packages...
libusb-1.0 found
libudev1 found
Udev directory found, adding rules...rules added
Adding SDRplay devices to the local hardware database...Done
USB name database not found, continuing...

Installing API files, the default locations are...
API service : /opt/sdrplay_api
API header files : /usr/local/include
API shared library : /usr/local/lib
Daemon start scripts : /etc/systemd/system
Daemon start system : SystemD

To continue the installation with these defaults press y and RETURN
or press n and RETURN to change them [y/n] y
Cleaning old API files...Done.
Installing /usr/local/lib/libsdrplay_api.so.3.15...Done
Installing header files in /usr/local/include...Done
Installing API Service in /opt/sdrplay_api...Done
Installing Service scripts and starting daemon...Created symlink /etc/systemd/system/multi-user.target.wants/sdrplay.service → /etc/systemd/system/sdrplay.service.
Done

The API Service has been installed and started. After the installation has
finished, please reboot this device.

To start and stop the API service, use the following commands...

sudo systemctl start sdrplay
sudo systemctl stop sdrplay

If supported on your system, lsusb will now show the RSP name

SDRplay API 3.15 Installation Finished
Time to reboot the system as mentioned in the output above.
sudo reboot
Verify that you can see your SDRPlay device after rebooting and connecting your SDR.
ubuntu@sdr01:~$ lsusb
Bus 001 Device 001: ID 1d6b:0002 Linux Foundation 2.0 root hub
Bus 002 Device 001: ID 1d6b:0002 Linux Foundation 2.0 root hub
Bus 002 Device 002: ID 1df7:3020 SDRplay RSPduo
Bus 003 Device 001: ID 1d6b:0003 Linux Foundation 3.0 root hub
Bus 004 Device 001: ID 1d6b:0002 Linux Foundation 2.0 root hub
Bus 005 Device 001: ID 1d6b:0003 Linux Foundation 3.0 root hub
In order to connect remotely via SDRConnect the sdrconnect service should
already be running and listening on port 50000.
Verify that the sdrconnect.service is up and running.
ubuntu@sdr01:~$ sudo systemctl status sdrconnect
● sdrconnect.service - SDRconnect Server
     Loaded: loaded (/etc/systemd/system/sdrconnect.service; enabled; preset: enabled)
     Active: active (running) since Sun 2025-07-13 13:19:50 EEST; 26min ago
    Process: 2052 ExecStartPre=/bin/sleep 30 (code=exited, status=0/SUCCESS)
   Main PID: 6096 (startServer.sh)
      Tasks: 24 (limit: 18709)
     Memory: 38.9M (peak: 39.3M)
        CPU: 9.191s
     CGroup: /system.slice/sdrconnect.service
             ├─6096 /bin/sh /opt/sdrconnect/startServer.sh
             └─6098 /opt/sdrconnect/SDRconnect --server --port=50000

Jul 13 13:19:52 sdr01.internal startServer.sh[6098]: RF Notch Disabled
Jul 13 13:19:52 sdr01.internal startServer.sh[6098]: DAB Notch Disabled
Jul 13 13:19:52 sdr01.internal startServer.sh[6098]: Hardware Control: 1st Client can control the hardware
Jul 13 13:19:52 sdr01.internal startServer.sh[6098]: Maximum number of clients: 8
Jul 13 13:19:52 sdr01.internal startServer.sh[6098]: PPM Correction: 0
Jul 13 13:19:52 sdr01.internal startServer.sh[6098]: Full IQ: Allowed
Jul 13 13:19:52 sdr01.internal startServer.sh[6098]: Audio mode: Allowed
Jul 13 13:19:52 sdr01.internal startServer.sh[6098]: Virtual Receivers (VRXs): Allowed
Jul 13 13:19:52 sdr01.internal startServer.sh[6098]: Server started
Jul 13 13:19:52 sdr01.internal startServer.sh[6098]: Press CTRL-C to stop the server
And confirm that it’s listening on port 50000 port.
ubuntu@sdr01:~$ sudo netstat -tlpan | grep 50000
tcp        0      0 0.0.0.0:50000           0.0.0.0:*               LISTEN      6098/SDRconnect
NOTE: In case you want to use gqrx with your RSPduo device and upon
starting up gqrx you don’t see the RSPduo in the device list, then make sure
to stop the sdrconnect service as the device is already in use by it.
So, to use gqrx with your RSPduo first stop the sdrconnect service.
sudo systemctl stop sdrconnect
Start up gqrx now and you should see the RSPduo in the device list. If you
don’t intend to use gqrx and want to stick to SDRconnect you should leave
the sdrconnect service up and running.
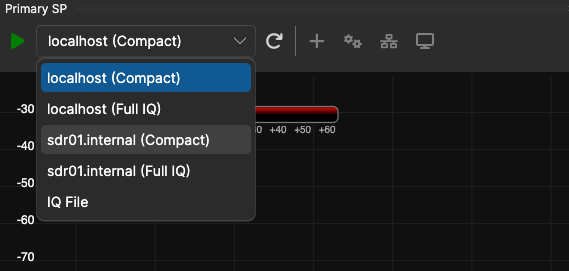
In order to connect to your Pi using SDRconnect you should first add a new
remote device. Go ahead and add your Pi to the SDRconnect remote devices list,
test the connection and save.

Once you’ve saved your device you need to Refresh Device List as well.
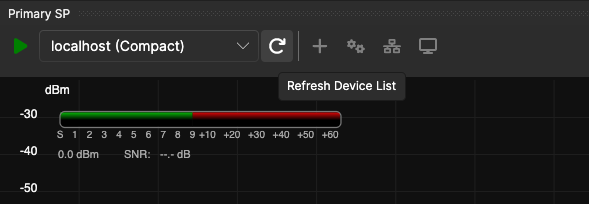
And now you should see your device and be able to connect to it.
Here’s a screenshot of SDRconnect receiving from some local WFM broadcast stations.
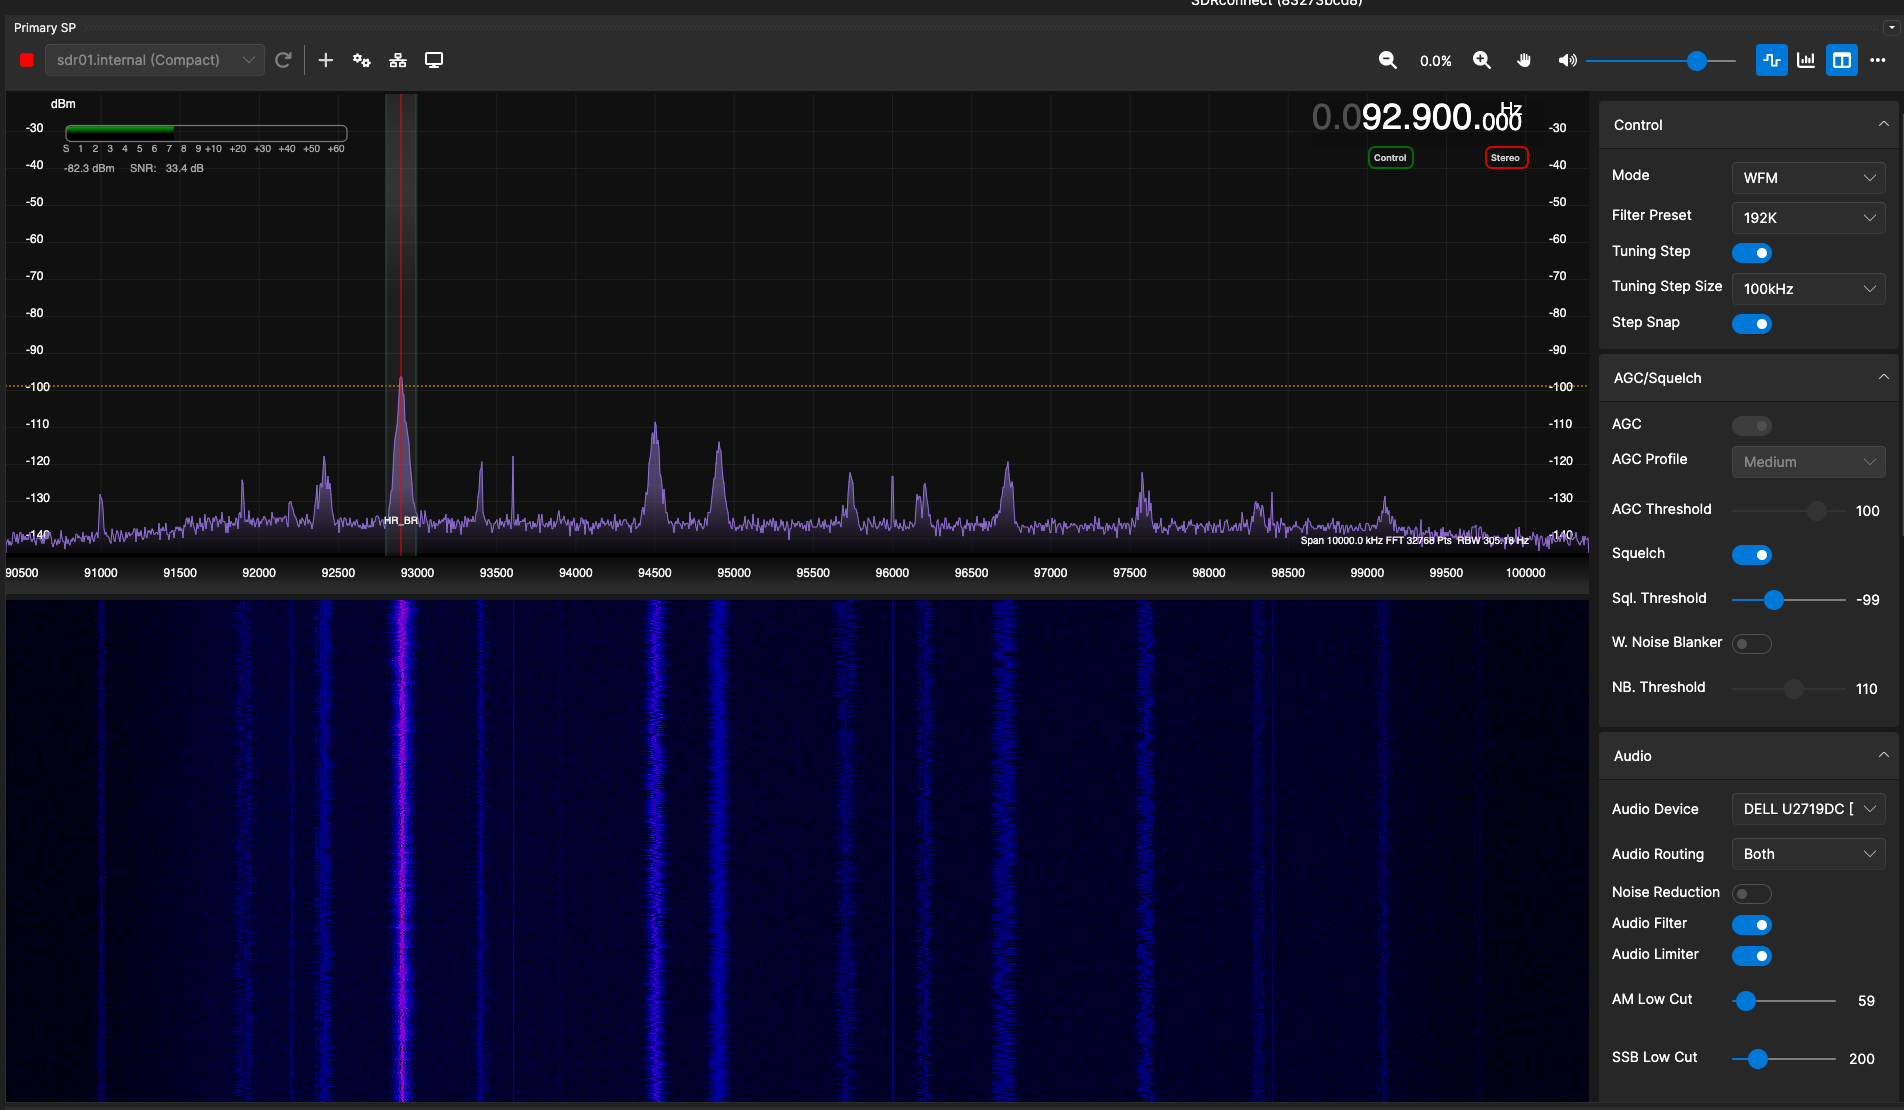
Unfortunately at the time of writing this document there was no activity on the
2m and 70cm bands, so I could not take some screenshots of them as well.
Well, that’s all for now.
LZ1DFB, 73!