
Code analysis with Jenkins and Clang scan-build
In this handbook we will see how we can use Jenkins and the Clang static analyzer scan-build for analyzing our project’s code.
Clang scan-build is used for analyzing your project’s codebase as
part of performing a regular build. Once the codebase has been
analyzed and built you will be able to browse the scan-build report
by using a web browser.
For more information on scan-build please refer to the official web
page of Clang
scan-build.
For the purposes of this example we will use the FreeBSD’s pkgng project.
Once we are ready with the project configuration and building we will make our Clang scan-build report available through Jenkins.
So lets start!
Requirements
- root access or sudo rights
- Jenkins CI instance
- Clang scan-build is installed. FreeBSD users please refer to this documentation for getting scan-build installed under FreeBSD
Tested And Verified
The setup explained in this handbook has been tested and verified on:
- FreeBSD 9.0 system
- jenkins-1.472
Creating a Jenkins project for running scan-build reports
Jenkins provides a ready to use Clang Scan-Build Plugin, but the plugin itself is designed for building and analyzing of MacOS and iOS XCode projects.
For that reason it makes no sense for us to use that plugin in our project.
Instead we will simply generate the scan-build reports and make them
available through Jenkins by using the HTML Publisher
Plugin.
First we would need the HTML Publisher
Plugin
which will simply archive and make available our scan-build report,
so now navigate to Manage Jenkins -> Manage Plugins -> Available
and install the HTML Publisher
Plugin
if you don’t have it installed already.
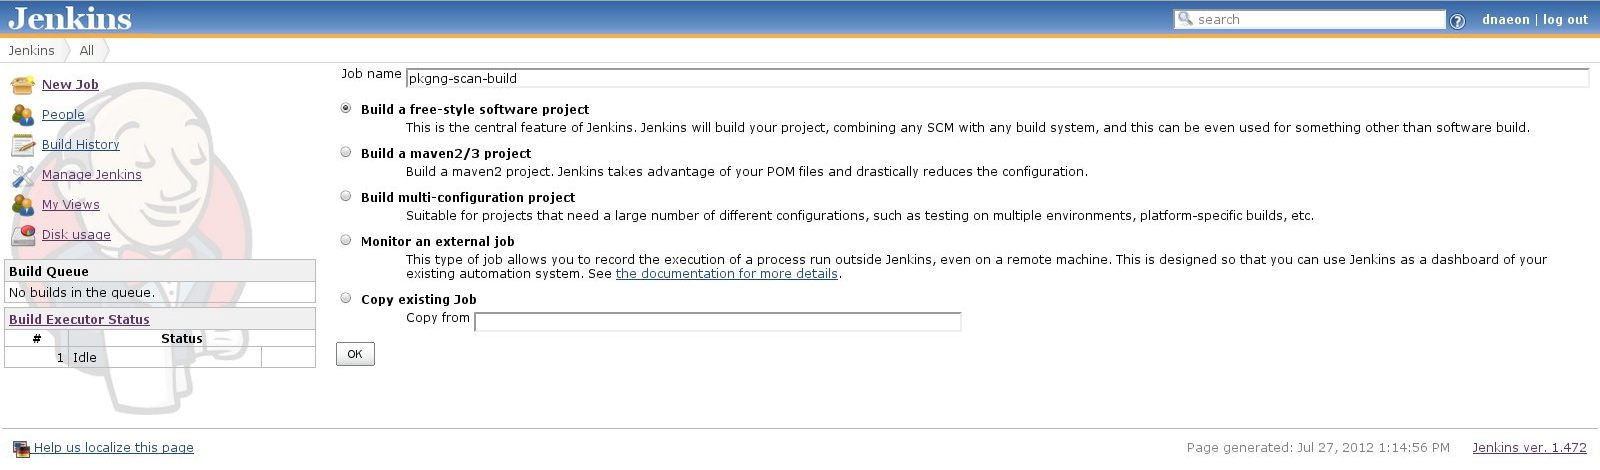
Now, lets create our Jenkins project for running scan-build reports.
Navivate to New Job and give the new project a meaningful name. In
this example for the project name I will use the pkgng-scan-build
name as shown on the screenshot below.
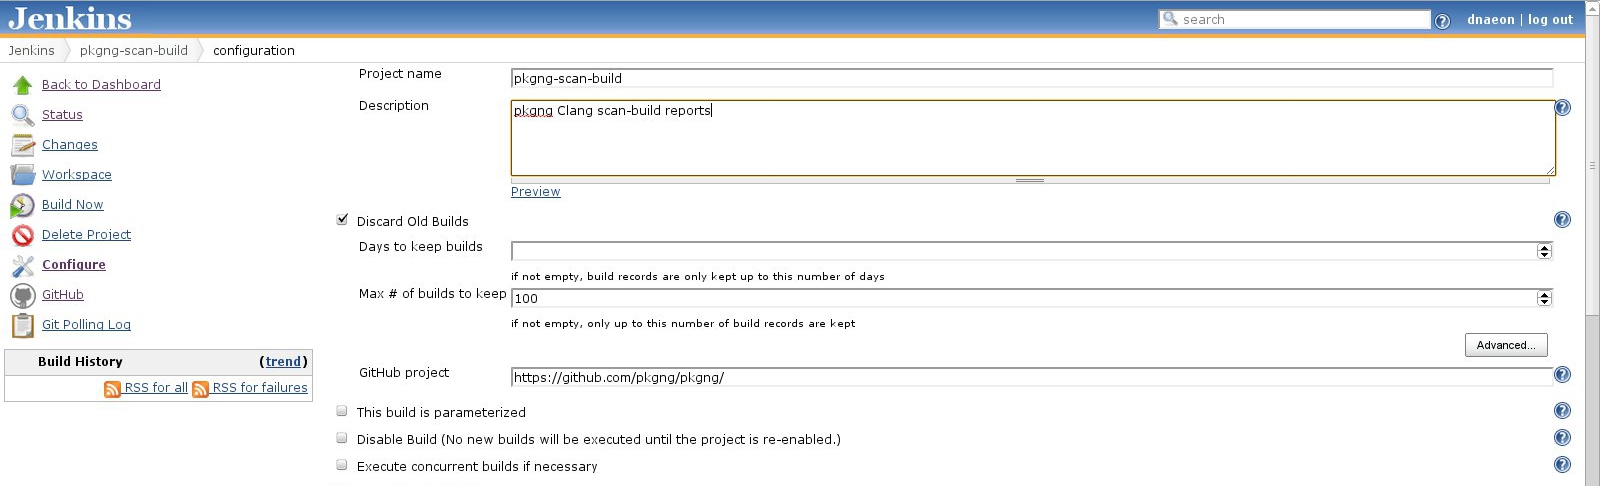
Once the new project is created we need to configure it - project description, SCM, number of builds to keep, etc.
Then we configure the Source Code Management section of the project.
The next section we configure is the Build Triggers one.
This is where we configure when a project is being scheduled for a build. In the screenshot below we poll the remote Git repository once a week and if there is a new change we schedule a build for it.
The scan-build Jenkins job will poll the remote Git repository once
every week at 20:30h at Sunday and if there’s a new change it will
schedule a build.
I choose to run scan-build reports once a week as they tend to be
quite resource consuming, especially if you run them on a slow
machine.

Now lets configure the build itself. This is where we define how the
scan-build reports are being generated. To do that we configure the
Build section of our project as shown in the screenshot below.
In order to add the build step click on the Add build step button
from the Build section of the project and select the Execute shell
option.

The Build section of the project is a simple shell script that takes
care of generating the scan-build report.
Below is listed the shell script used for building the scan-build
report.
# do not exit immediately if any command fails
set +e

# temp directory to store the scan-build report
SCAN_BUILD_TMPDIR=$( mktemp -d /tmp/scan-build.XXXXXX )

# directory to use for archiving the scan-build report
SCAN_BUILD_ARCHIVE="${WORKSPACE}/scan-build-archive"

# generate the scan-build report
/usr/local/llvm/Release+Asserts/bin/scan-build -k -o ${SCAN_BUILD_TMPDIR} make

# get the directory name of the report created by scan-build
SCAN_BUILD_REPORT=$( find ${SCAN_BUILD_TMPDIR} -maxdepth 1 -not -empty -not -name `basename ${SCAN_BUILD_TMPDIR}` )
rc=$?

if [ -z "${SCAN_BUILD_REPORT}" ]; then
	echo ">>> No new bugs identified."
	echo ">>> No scan-build report has been generated"
else
	echo ">>> New scan-build report generated in ${SCAN_BUILD_REPORT}"

	if [ ! -d "${SCAN_BUILD_ARCHIVE}" ]; then
		echo ">>> Creating scan-build archive directory"
		install -d -o jenkins -g jenkins -m 0755 "${SCAN_BUILD_ARCHIVE}"
	else
		echo ">>> Removing any previous scan-build reports from ${SCAN_BUILD_ARCHIVE}"
		rm -f ${SCAN_BUILD_ARCHIVE}/*
	fi

	echo ">>> Archiving scan-build report to ${SCAN_BUILD_ARCHIVE}"
	mv ${SCAN_BUILD_REPORT}/* ${SCAN_BUILD_ARCHIVE}/

	echo ">>> Removing any temporary files and directories"
	rm -rf "${SCAN_BUILD_TMPDIR}"
fi

exit ${rc}
The above script assumes that you have installed scan-build in
/usr/local/llvm/Release+Asserts/bin/scan-build. The report will be
archived in Jenkins workspace and proper exit codes will be returned.
The last thing we need to do is to publish our scan-build report
which we configure in the Post-build Actions section of our project.
To do that in the Post-build Actions section of your project click
on the Post-build action button and select Publish HTML
reports.
Then just fill in the fields - HTML directory to archive,
Index page[s], Report title and Keep past HTML reports.
The HTML directory to archive is the one that is being generated
during the scan-build run, which is determined from the build script
we’ve used in the Build section of our Jenkins project.
On the screenshot below you can see the values used in the different fields for publishing the scan-build reports.
The Build section of the project is a simple shell script that takes

Once ready click on the Save button and do a test build of the
project. Once the project has been succesfully built you will be able
to access the scan-build reports of the project as shown in the
screenshot below.
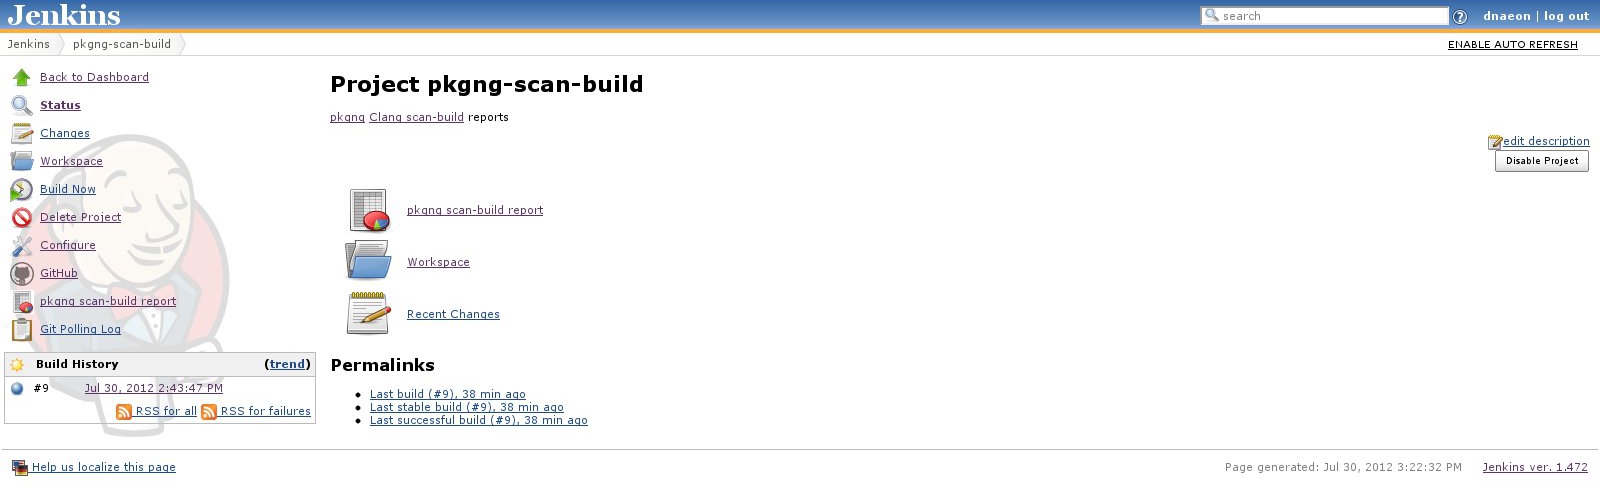
And that was it. Now you have a Jenkins project that does continuous analyzing of your project codebase using Clang scan-build